
Essential Software Installation required to run MSBI practical's
Visual Studio Community Edition 2019
SQL Server Management Studio(SSMS)
Installation of (SSIS)Integration service
Installation of (SSAS) Analysis service
Installation of (SSRS)Reporting service
Check SSDT installation available under Visual Studio 2019
This article document is targeted to all the readers who are seeking to learn MSBI but finding difficulty to create learning environment in their laptop of desktop system. This article will help them to get rid of those hiccups which kept them away till this day from doing so. We have tried to put all necessary point in detail so they do the installation and reader is ready to create his very first project lab. So without wasting much of your time coming straight to the point that we are starting.
This is first thing which learner should be aware of that is minimum configuration should one have on his/her laptop or desktop system so that the rest software download and its installation won't be troublesome.
There are four types of software installations required before we start any MSBI components practical's and create its first "proj" file.
Very first software which is mandatorily required is to install in your computer or laptop is doing installation of Visual Studio. While writing this document we have installations version of 2019 the latest one available on authentic source of Microsoft website.
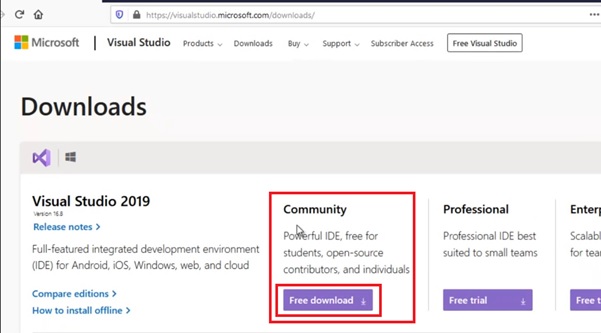
There are three variants available: -
As mentioned above this article will showcase Visual Studio - Community edition download and its installation process reason behind is that as it is FREE (very useful for students and fresher learners) and it covers all the essential feature require to learn Microsoft Business Intelligence(MSBI).
You have to click on "Free download" tab which is given on the Community edition in order to get Visual Studio - Community edition installer downloaded.
As you click on "Free download" tab which is given on the Community edition it will prompt to save "VS installer exe" so that it gets downloaded to your local system as it is shown in the figure down below: -
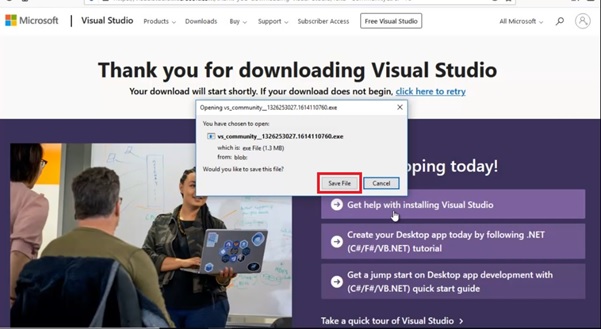
Once installer is downloaded successfully actual Visual Studio - Community edition installation process screen appears will start after double clicking and opening "VS installer exe".
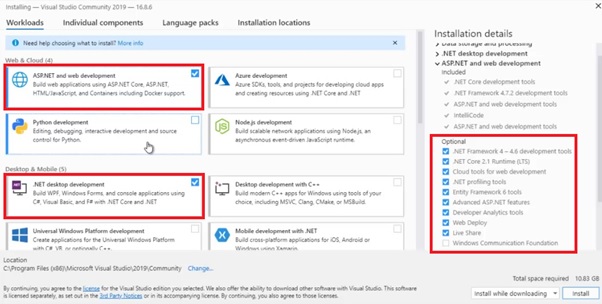
After opening the "VS installer exe" some of the necessary associate downloads will get completed and then it will open Visual Studio - Community edition Workloads pane as shown below. Under Workloads pane scroll-choose and select checkbox on "Data Storage and Processing" tab followed by selection on Installation details given on the right side. Do select all the three check box on "SQL Server Data Tools" "Azure Data Lake and Stream Analytics Tools" & ".NET Framework 4 - 4.6 development tools" under it.
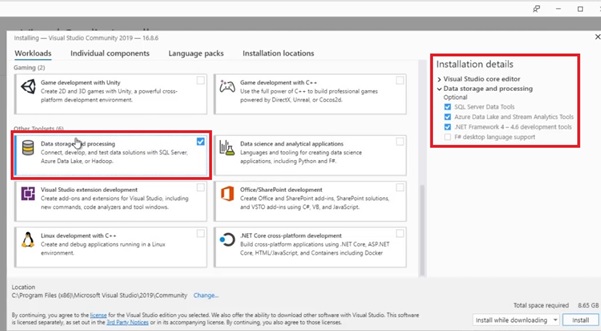
Also under Workloads pane scroll-choose and check mark the checkbox named "ASP.NET and web development" & ".NET desktop development" tab which will be helpful and essentials required for the customizing the SSIS package in order to do MSBI programming as shown in the figure down below.
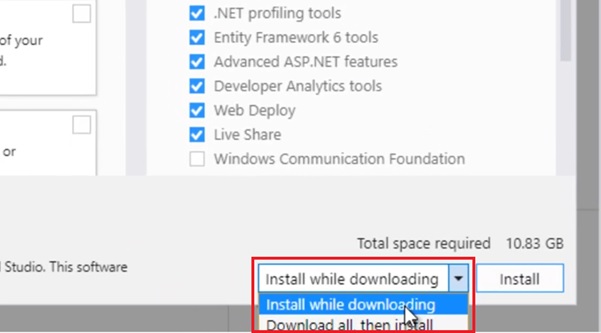
Before initiating ahead select the type of install option with good internet/network speed select "Install while downloading" wherein download and auto installation will run in parallel resulting in saving of time or else select "Download all, then install" in this case setup will completely download on the local system and then manually you can complete the installation. Once selected from the dropdown out of two options installer will be ready to act upon accordingly and get installation done on the (laptop or desktop) system.
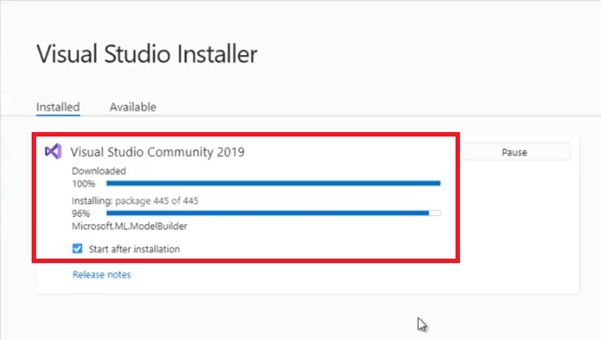
In our article we have chosen "Install while downloading" installation option and Visual Studio installer has started downloading software along with installation simultaneously, progress bar of each task performed can be seen as shown below. Downloading in the form of package will be done first, followed by the installation part all representing it download progress in the form of percentage.
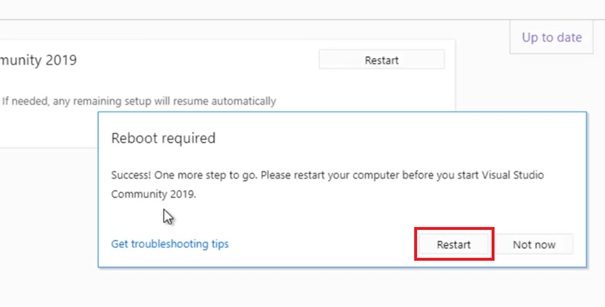
Once the installation process is successful, Visual Studio installer will ask you to do a complete restart of the system so that all files installed during the installation process are correctly updated with the program files and in order to take it effect to use operating system strongly recommends restart of laptop or desktop. So we too suggest, better take a restart of your system.
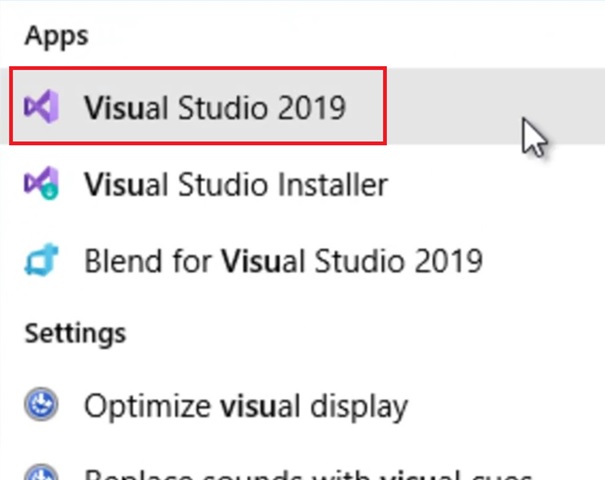
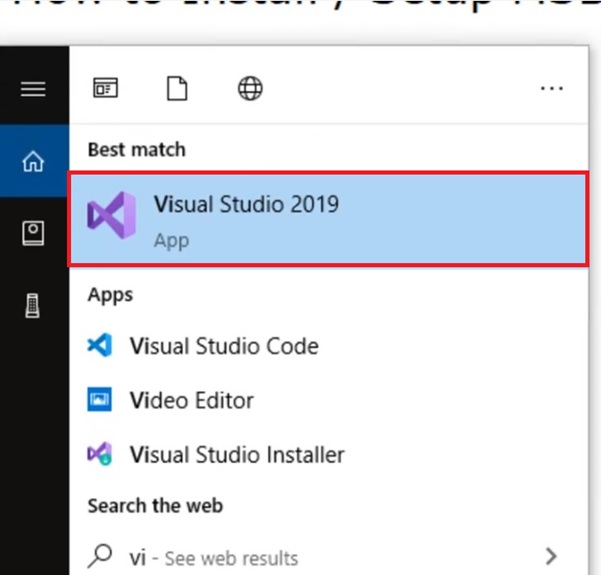
Once the restart is complete you will be able to see the Visual Studio community edition when you click on the Start menu option under the Apps as shown down below.
Please note: - For the first time when Visual Studio community edition is opened it also offers you select theme options given in pleasant colors theme, select it of your choice and proceed ahead. Followed to that there are certain auto process runs (let it run) which will be working in the background in order to make Visual Studio community edition running.
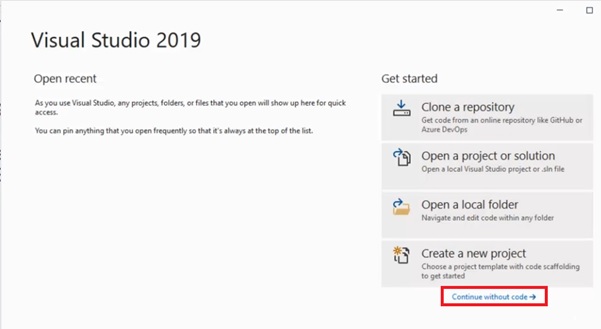
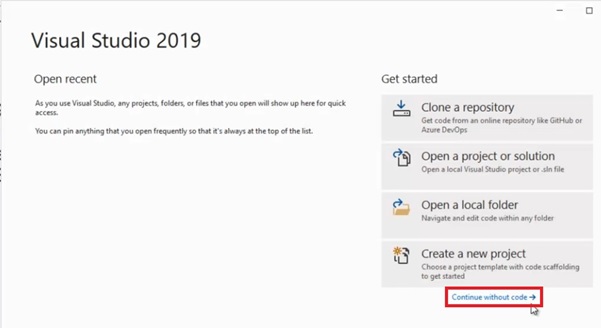
Once done you will get to see create project screen which means you now you are all set with successful installation of Visual Studio community edition as shown in the image down below.
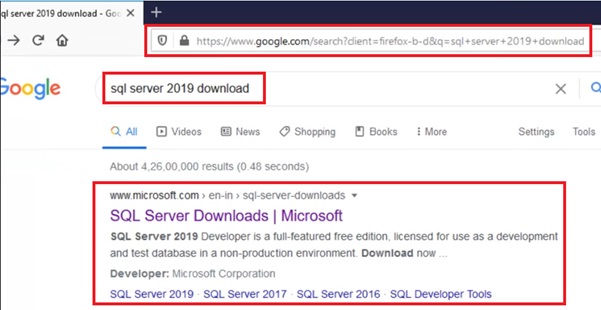
Yes with success of Visual Studio community edition we will now go to next step in order to perform download of SQL Server 2019 Developer Edition setup from the internet. Best way is to go to URL: www.google.com and search for SQL Server 2019 developer edition. The very top link is from the Microsoft website and it is the authentic and safe source to download software resource.
Once you click the link ensure that it is as shown below link of Microsoft's SQL Server website https://www.microsoft.com/en-in/sql-server/sql-server-downloads
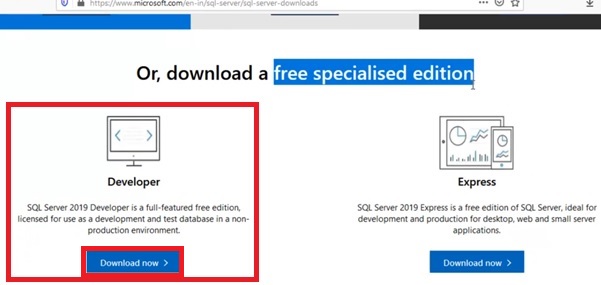
Under to that you will find two variants of SQL Server 2019
Express edition won't be serving our needs of handling MSBI work operations as it is for minimum development and production purpose use. And for that we have to use other variant option which is SQL Server 2019 Developer edition.
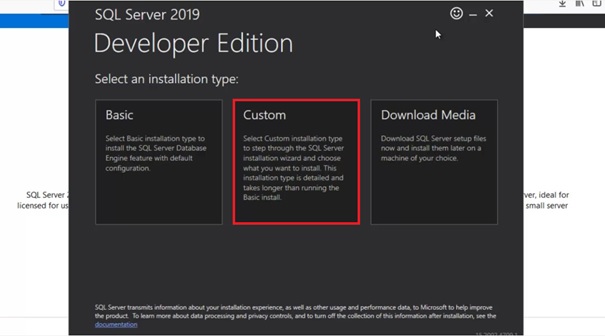
Upon clicking on the "Download now" on "Developer" tab SQL Server installer exe will get downloaded and after double clicking and running the downloaded file named "SQL2019-SSEI-Dev.exe" it will start actual installation of the SQL Server 2019 Developer edition. Next screen under it is the selection of the installation type, here select "Custom" option so that we can select all the necessary custom feature required as per learning to MSBI.
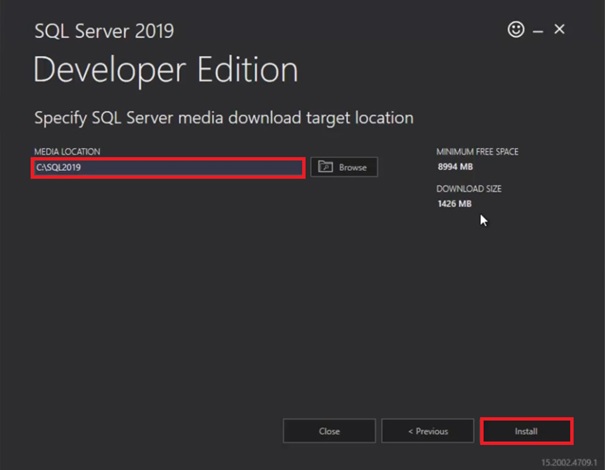
Next is to select the installation drive location of your local system where SQL file can be downloaded. Prefer to keep the same default target location for the setup which installation has selected i.e. the C# drive where it can have all access to program file with which SQL Server will be working.
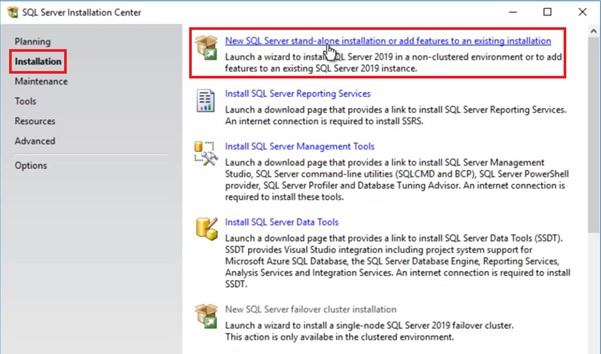
Once the installation package has completed it will next open up SQL Server installation center to complete rest installation of "SQL Server 2019 Developer edition" remaining process. Now under the "Installation" click and select "New SQL Server stand-alone installation" option
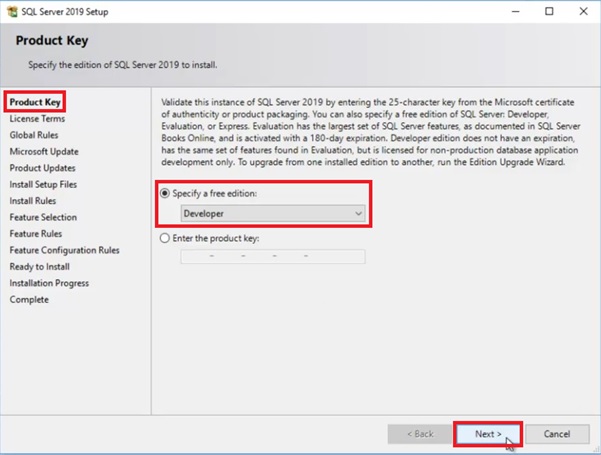
Thereafter under the "Product Key" do "Specify a free edition type" to "Developer" which can be done by selecting it from the drop down field as shown the image down below and then click on "Next"
Thereafter under the "License Terms" tab accept the terms and condition by marking the check box. Followed to that "SQL Server 2019 Developer edition" will check for Global Rules. Upon passing Global Rules next setup will look for Microsoft Update and Product Update and if no update is found it will move ahead.
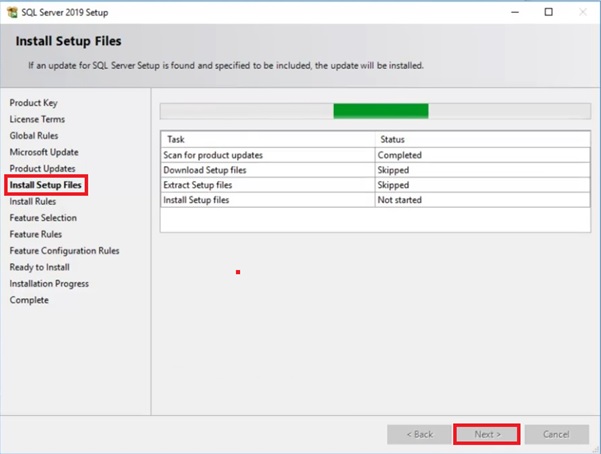
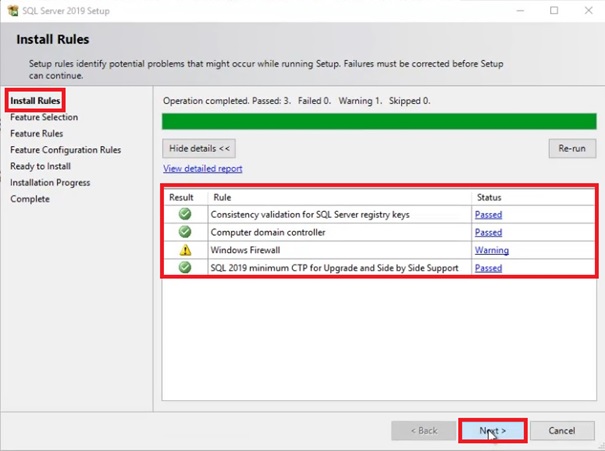
Thereafter it will look for "Install Rules" after passing installation rules successfully we can click on "Next" to move ahead the installation process as shown in the figure down below. Or else setup won't allow to move ahead unless the installation rules are successfully passed.
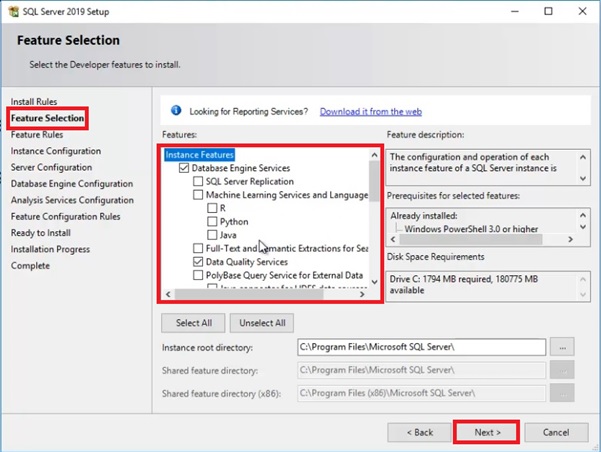
Now time for the important installation screen to appear where we have to carefully choose the necessary installation feature that need to be installed to run smooth MSBI. Remember do not select all the feature's which you may not be of your use as it will lead to unnecessary utilization of your system's disk space and also it will slow down the working of "SQL Server 2019 Developer edition" software.
To work on MSBI projects do a check mark on "Database Engine Service", "Data Quality Service", "Analysis Service", "Data Quality Client" and "Integration Service" under Instance Feature.
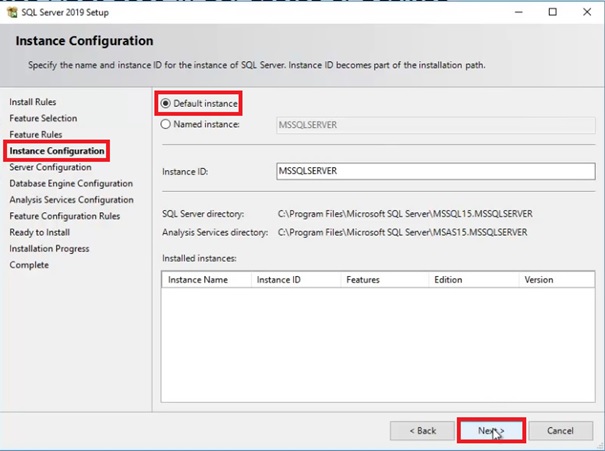
Moving ahead is to set "Instance Configuration" where recommended is to keep the default selection i.e. "Default instance" marked as shown in the figure down below and click on Next
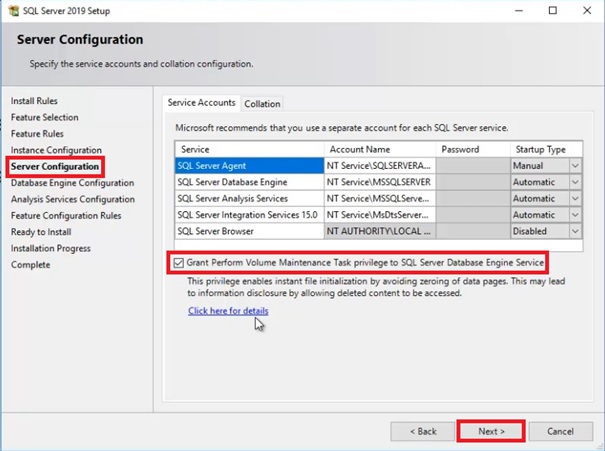
Ahead is "Server Configuration" where we have to grant the permission to SQL Server Database Engine Service by doing a check mark on the check box. This enable instant file initialization by avoiding zeroing of data page. Now click on "Next".
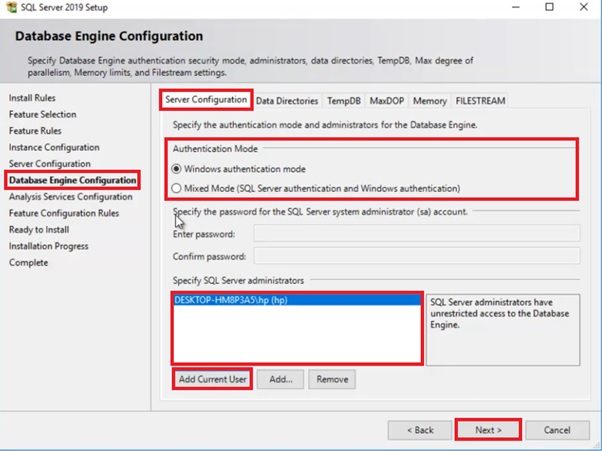
Now comes "Database Engine Configuration" where we have to keep "Authentication Mode" set to default "Windows Authentication Mode" and also specify SQL Server Administrator to by clicking on the tab "Add Current User" as shown in the figure below. This is a security feature which we are granting at this time of installation so that the added user can use it without any restriction.
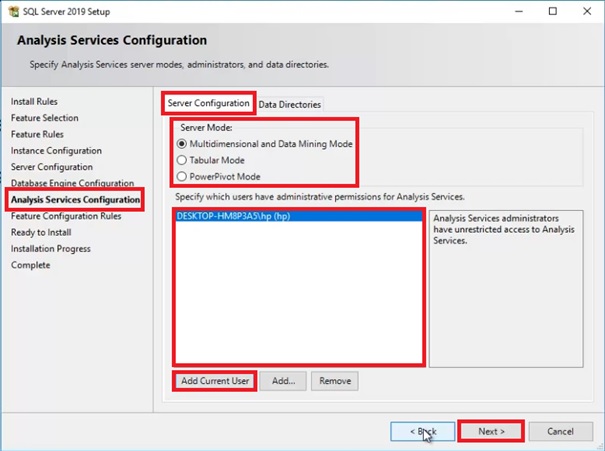
Followed to that we have "Analysis Services Configuration" where "Server configuration" is set to "Multidimensional and Data Mining Mode" by default, keep it as it is. In the event when you are working on Analysis service using Tabular during then select "Tabular mode". Similarly here also we have safety feature which allows unrestricted access to SQL Server Administrator and to do that we have to add/remove it by clicking on the tab "Add Current User" as shown in the figure below: -
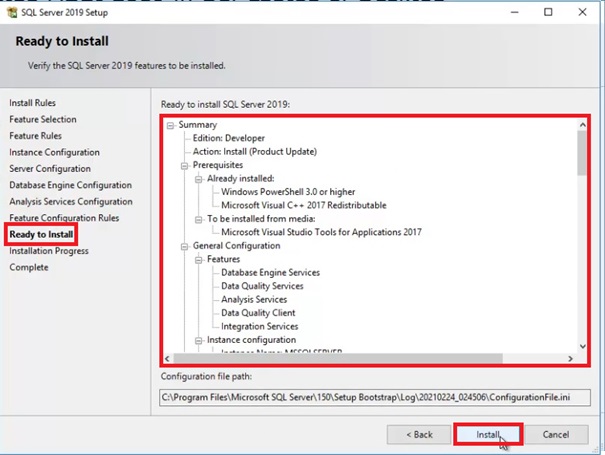
Finally all set and ready to do the install "SQL Server 2019 Developer edition" software a click away by pressing the "Install" button.
Once the setup is succeeded you will see the following success pictorial with green check marked on all of the feature with status labelled as "Succeeded".

So here we go with second success of the installation of "SQL Server 2019 Developer edition" software.
Coming to the another aspect of installation related to SQL Server which we can say the second part of SQL Server installation also known as nice UI face of SQL Server SSMS (SQL Server Management Studio).
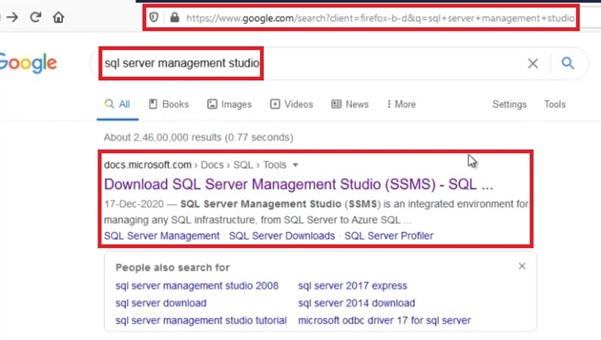
Go to www.google.com type "sql server management studio" on the search box and thenx download in the same manner from authentic download source from Microsoft website as shown down below: -
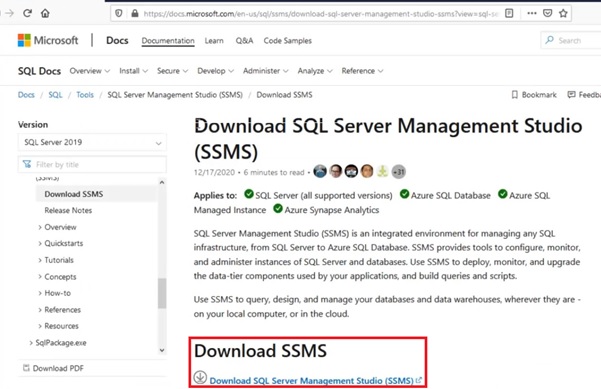
On the Microsoft website click on the given link of "Download SQL Management Studio(SSMS)" which will initialize the downloading of the complete setup
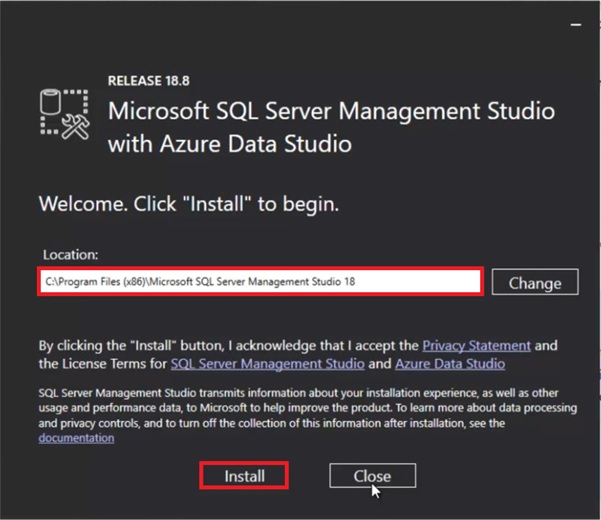
Once the setup is downloaded and on running the "SSMS-Setup-ENU.exe" you will see the below installation screen with "Install" button to proceed ahead.
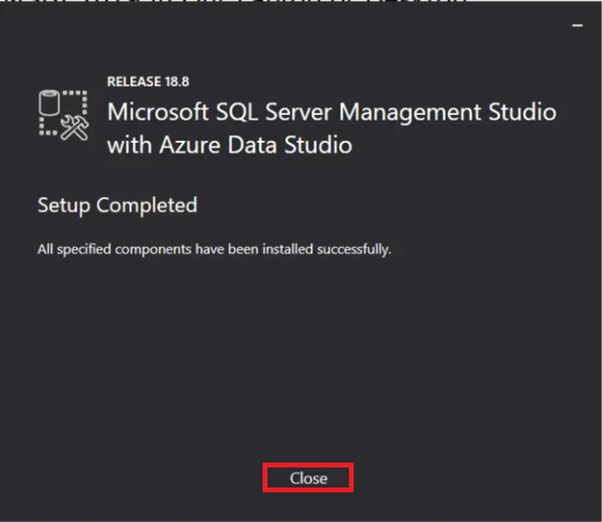
After the installation is completed successfully you will get to see below Setup Completed screen which means now SQL Management Studio(SSMS) available to use.
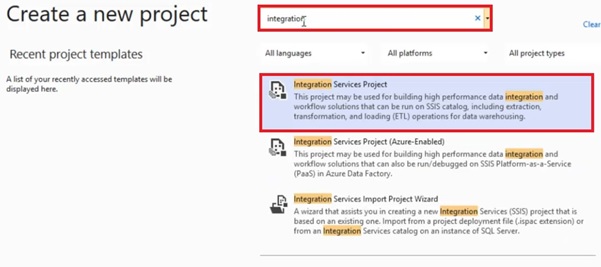
Hey there we have almost done with the installation of Visual Studio 2019 Community edition, SQL Server 2019 Developer edition and SQL Server Management Studio(SSMS). Now it is time to do the installation of SQL Server Data Tools which is primarily referred as SSDT. So under it very first we would be installing is Integration service also known as SSIS which can be done very easily.
Just open up by clicking "Visual Studio 2019" which is available under Start Menu as this is recently installed software you will be able find it easily or if shortcut is available over the desktop then that can also be used to open it.
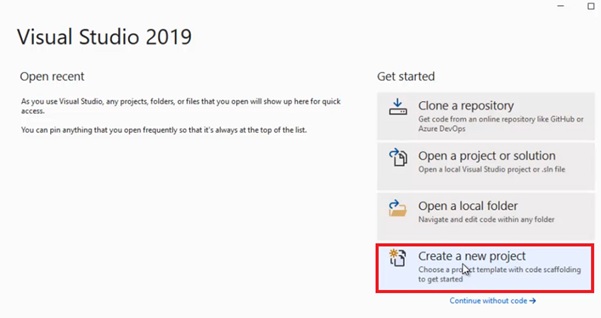
Once the screen is open, now just get started with the "Visual Studio 2019" and do continue with the option "Continue without code" which is available on the right bottom side.
And on the top menu click on Extension which will open its submenu "Manage Extension" as shown in the image down below. This will result in opening a window "Manage Extension" where you can type and search for "Integration" on the search box available at the right so that you can download it. This download can be 100% trusted with closed eyes that it will be downloaded from authentic resource of Microsoft website.

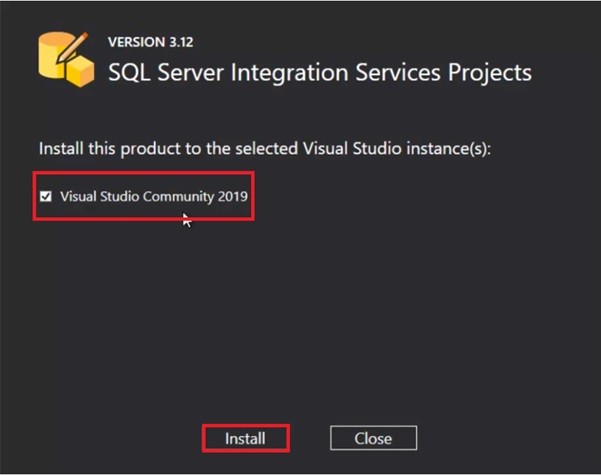
Once you are done with the download run the step and get "Microsoft Integration Services Projects" installed on your system. Before you click on "Install" button do not forgot to mark the check box stating that the "Integration service" will be installed as an instance of Visual Studio 2019 Community edition.
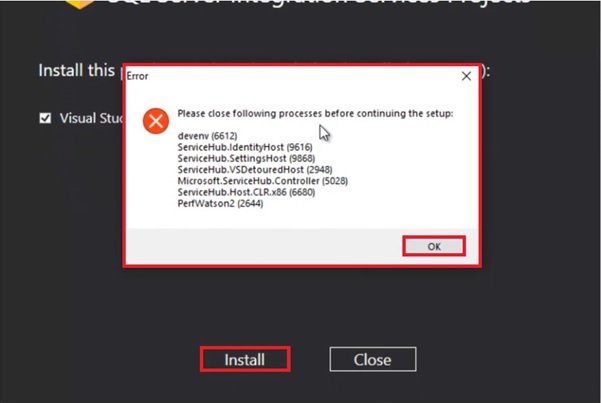
Please note that as Visual Studio 2019 Community edition will be marked as an instance so do not forget to close Visual Studio 2019 Community edition all the windows completely in your local system so that the "Integration service" gets installed without prompting any warning message as you see down below.
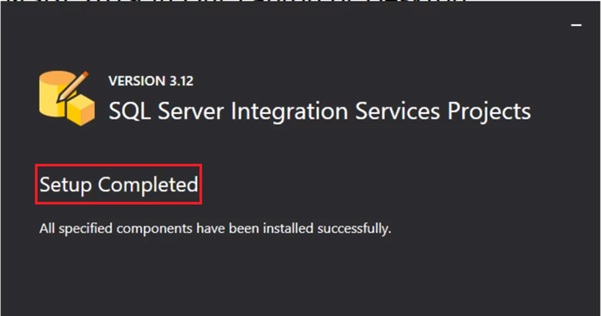
You will get to see below SQL Server Integration screen with a message popped "Setup completed" when SSIS installation is completed.
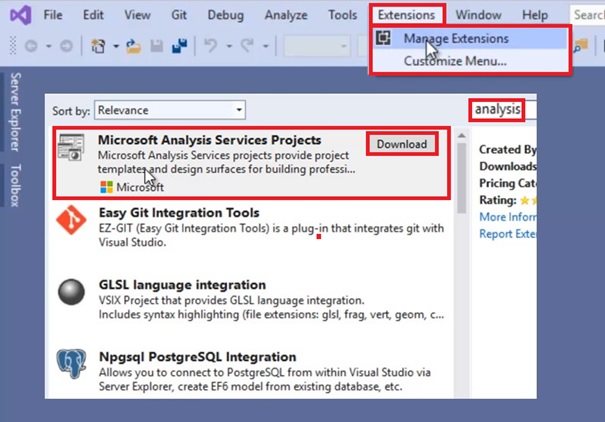
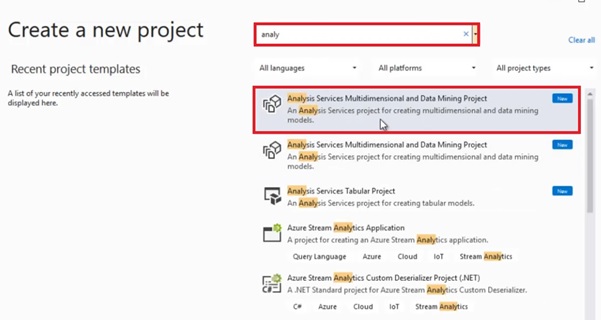
The next we are going to install is (SSAS)Analysis services the second component of MSBI with which you will able to execute Analytical processes. In order to install Analysis service again we have to repeat same steps as we did for Integration service. Again open Visual Studio Community edition and on the top menu click on "Extension" which will open-up submenu "Manage Extension" click on it so that its window open up as shown in the image below on the search bar given at the right hand side type manually "Analysis" resulting in showing "Microsoft Analysis Services Projects" download button option.
You can proceed with downloading which will automatically start downloading of Microsoft Analysis Services Projects setup. Depending on the internet or network speed download will complete then you can go ahead with the installation.

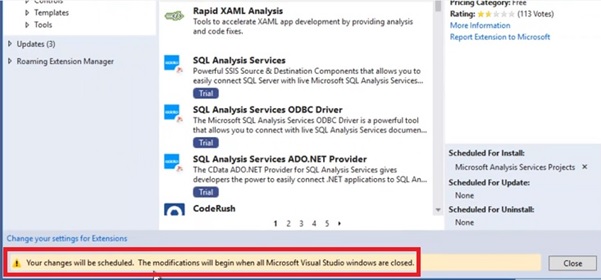
In the event when by any chance if any Visual Studio screen is left open installation setup will halt and popup alert message it cannot continue ahead unless all the windows of Visual Studio community edition is closed as shown in the image below.
After closing all the windows of Visual Studio community edition, setup will resume to do installation of "Microsoft Analysis Services Projects" and installer will prompt up with permission window to do modification to existing Visual Studio community edition as you see down below. Once "Modify" permission is granted necessary changes will be done to installation and screen with progress bar will execute.

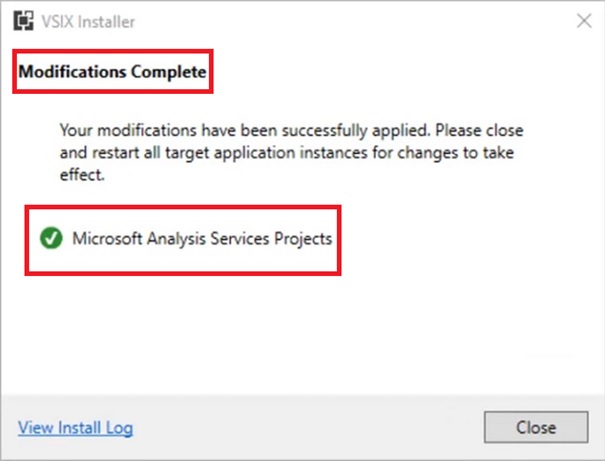
Since the process is of modification to existing "Visual Studio community edition" installation of "Microsoft Analysis Services Projects" will take time depending upon system configuration. Once the installer has completed the modifications you will get to the see below "Modification Complete" screen with a green colored checked marked on "Microsoft Analysis Services Projects".
Readers if you have completed successful installation of all necessary setup as mentioned above by following this article document now it is time to do final installation of Reporting service. And for that you have once again open "Visual Studio community edition" from the Start Menu.

Get started with the "Visual Studio community edition" with the option "Continue without code"

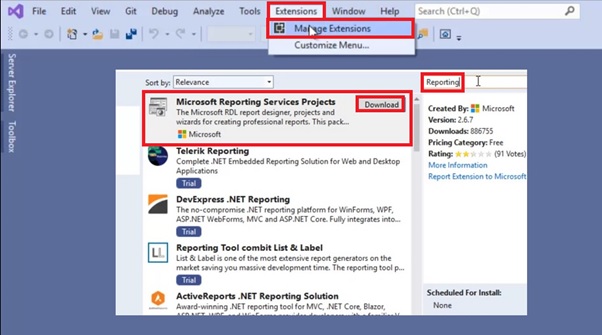
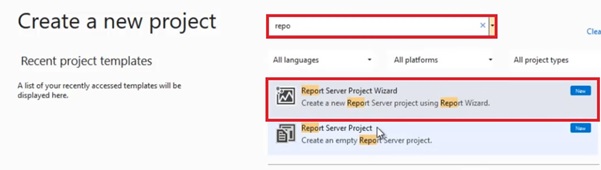
To do the Installation of Reporting service has nothing new to do in it. Exactly it will also incur the same steps which we did it above for Integration and Analysis service. Click on the Extensions > Manage Extensions which will open as window where you have to search for Reporting on the right hand side and it will find downloading "Microsoft Reporting Services Projects" option for you as seen below: -
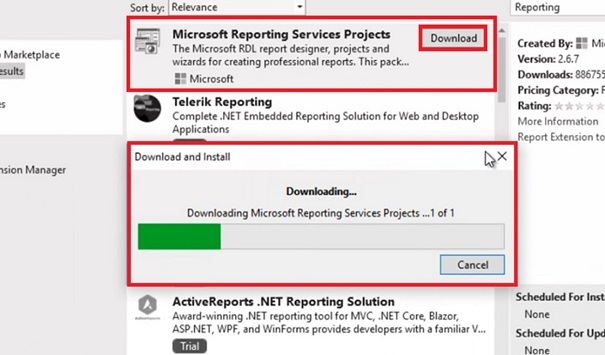
After you click you on "Download" button will get to see Download and Install a progress bar of "Microsoft Reporting Services Projects"
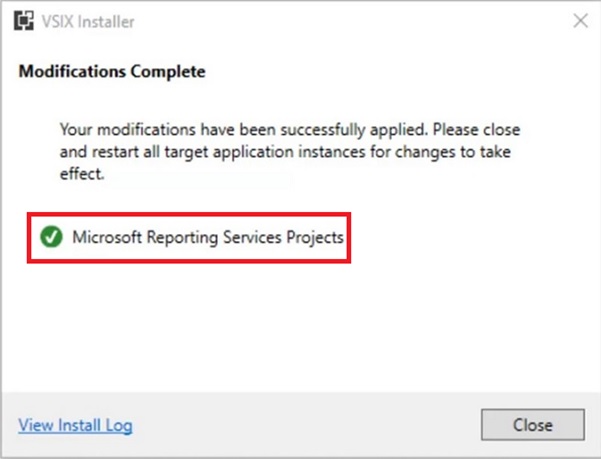
In the event where VSIX installer do not find any "Visual Studio community edition" window open it will go and continue the process of "Microsoft Reporting Services Projects" installation.
You can now go to Visual Studio 2019 Community Edition and check whether all the three components of MSBI - SSIS, SSAS and SSRS are seen when you go to create new project as shown in the image down below
Well congratulating all the readers if you have completed all the mentioned installations steps as demonstrated in this article you are ready to start with MSBI practical's along with SQL Server.
Or still the article is having difficulty to understand recommending all of the readers to also view our full fledge video covering "Visual Studio community edition", SQL Server 2019 Developer edition, SQL Server SSMS (SQL Server Management Studio), Microsoft Integration Services Projects, Microsoft Analysis Services Projects and Microsoft Reporting Services Projects practical installation by BI expert Mr. Gurunatha Dogi sir.
Order only MSBI self-study learning video materials which are available with customized package costing 999 INR/15$. Click this link here to see details and order it.