

Hey Friends, welcome back to our #Learn #MSBI tutorial site, This is continuity part of our previous article where we had discussed about dimensions, snowflake, star schema, face table. So if you have landed here directly then requesting you read previous article if you already know about those topics then you can continue reading this article. Click Here For Part 1 article.
About Me: I'm Gurunatha Dogi having 10 years of experience in IT sector, worked on various technologies like Adobe Flex, PHP-MYSQL, ADO.NET, ASP, ASP.NET, LINQ, Entity Framework, SQL Server, Java, Oracle, Jquery, AngularJS, MVC, Andriod and so on. For past 7 years working with #Questpond as an faculty/trainer. #Questpond is found is by Mr. ShivPrasad.K, with a vision to spread knowledge. #Questpond courses are of very low cost as compared with other institute. If you ask me about Mr. ShivPrasad Koirala, Mr. Koirala is having more than 20 years of experience, #microsoft MVP, #C-Sharp Corner MVP, #Codeproject MVP, author of many good books and an well-known personality in IT world to know more about him just type his name on google search read his articles and videos on youtube channel.
Coming back to article, since we have already discussed theory part in part 1, Here in this article we will learn designing of star schema step by step with a real time example.
Here in this example we will design 4 dimension time package and 1 fact table package using SSIS toolbox.
So for the same we have 4 CSV source files which have master data and using that master files we will design our 4 dimension package one by one and 1 CSV source file which has data for fact table. Here we first we will load our 4 dimension table and then we will load our fact table.
Star Schema where all the dimension tables are directly connected to fact table. So let's design it in a same way step by step.
Real Time example : We will take up real time example of customer buying a property in #India. So in this example we need master tables of State, City, Property and Property Type and in a middle our fact table will be "Customer" since customer will buy a property. So let's design this example in a star schema way.
Step 1 :
In this step create data destination tables for dimensions and fact we will create 4 dim tables and 1 fact table to load data in datawarehouse coming from source CSV files. Note : Datawarehouse is SQL SERVER
So let's create 4 dimension tables or master tables - State, City, Property and Property Type in our SQL Server Management Studio as shown in below image.

So guys you have seen that we have successfully created all dimension datatables and 1 fact table.
Step 2 :
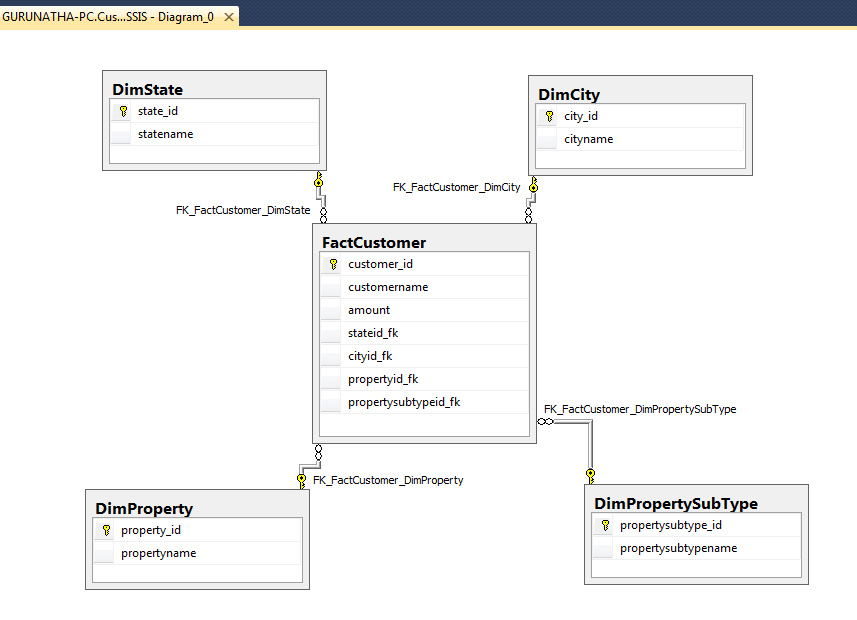
In this step 2 we need to make relationship between fact-table and dimension-table. Since fact-table consist of foreign keys of master tables. So inorder to make relaitonship go to -> SQL management studio -> your database -> Database diagrams.
Make relationship state_id with stateid_fk, city_id with cityid_fk and so on as shown in below image.
Step 3 :
Since we successfully designed our destination datawarehouse now let's create our source files for this example we will use our source file in a CSV format. So let's create sample source files one by one.
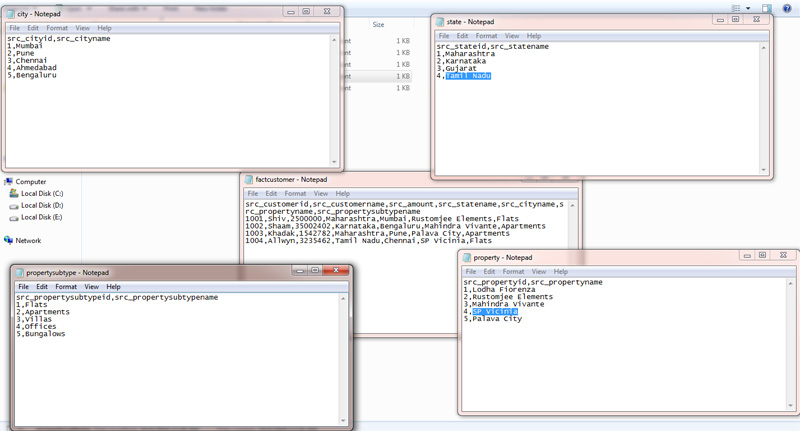
The only difference between in step 1 and step 3 is fact customer datasource it is not matching with fact-customer datatable in destination. If you see closely at source we state, city, property and propertysubtype in a string format and there (Datawarehouse) we need in integer format and which is of foreign keys of master tables. So before loading fact-customer table we need to load all master tables or dim-tables then to load fact-customer table so match and update it with their respective foreign keys.
Step 4 :
In this step we will start our designing of star schema, Here first we will load our master tables and then we will load fact table at the end, why because our fact source file have string data for state, city, property and propertysubtype but our requirement in the fact-destination to load foreign keys of master table and that is only possible if we first load our master tables and then load fact-table to destination with foreign keys .
So we will start a new SSIS project and since we have 4 master tables for the same we will create 4 packages under project as shown in below image.
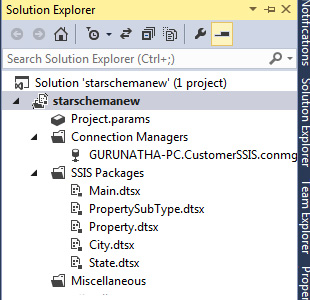
As you saw we have successfully create 4 packages and 1 main package where we will cummulate all packages under one roof.
Step 5 :
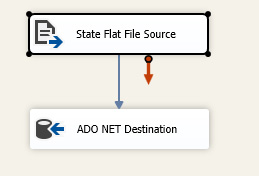
So first start with state package, open state package and drag and drop data flow task in control flow task -> go to data flow task and drag and drop Flat File Source since our state source file is in a CSV format so configure Flat File Source component if you are new to #MSBI then request you to read our previous articles to know step by step to configure data flow task with Flat File Source component and ADO.NET destination component.
Once you have configured Flat File Source component successfully, drag and drop ADO.NET destination and configure it with SQL Server, complete representation is shown below image.
If you want to know steps to configure ADO.NET destination and Flat File source component then visit this link.
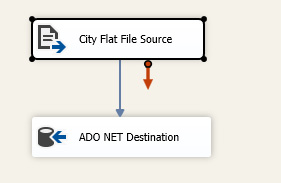
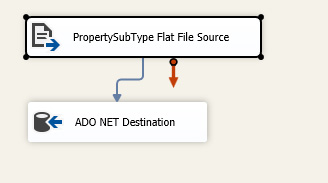
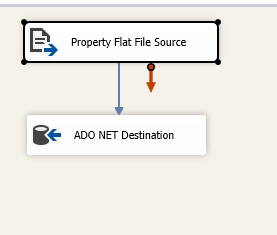
So friends once you have successfully updated state package, same way create and update packages for property, city and propertysubtype packages.
Above is a kind of home work or practice you have to execute. Still if you are facing any issues then let me know will provide you complete steps with source code.
Step 6 :
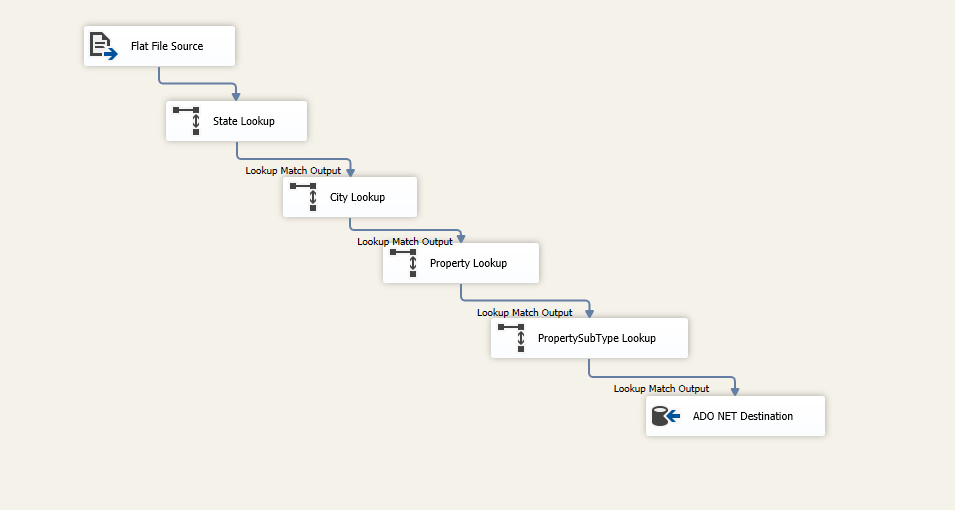
Once you have successfully executed master packages now we need to configure fact-table package i.e. Customer Table.
Drag and drop -> flat file source and configure fact source file. Since we need to get foreign keys in our fact-destination columns for that we need to match existing fact-source data src_statename with master state table statename to get state_id i.e. foreign key for fact-destination and same way src_cityname with cityname, src_propertyname with propertyname and src_propertysubtypename with propertysubtypename to get all foreign keys.
In-order to do this kind of matching and get a key from that we need to implement a new component called LookUP component. If you are not aware with this component then read more here about lookup component.
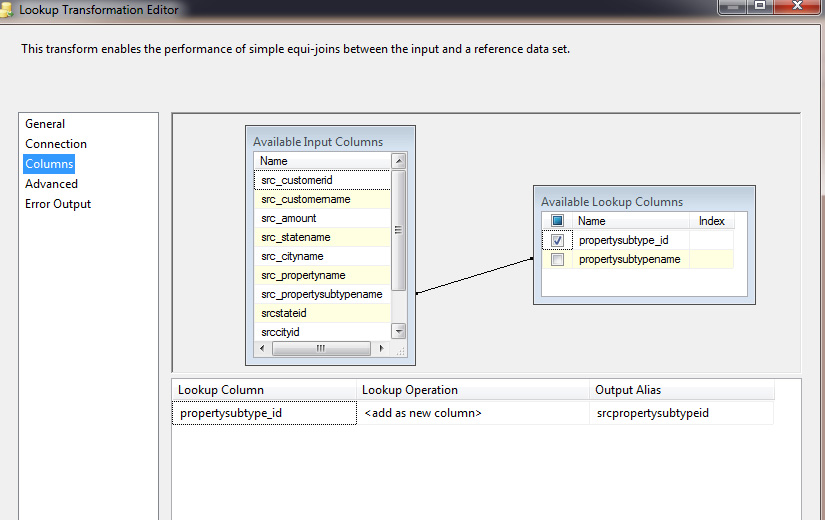
We will go one by one i.e. we will first get the key for src_statename. So let's drag and drop a lookup component name it as state-lookup.

Right click on that lookup component and configure it.
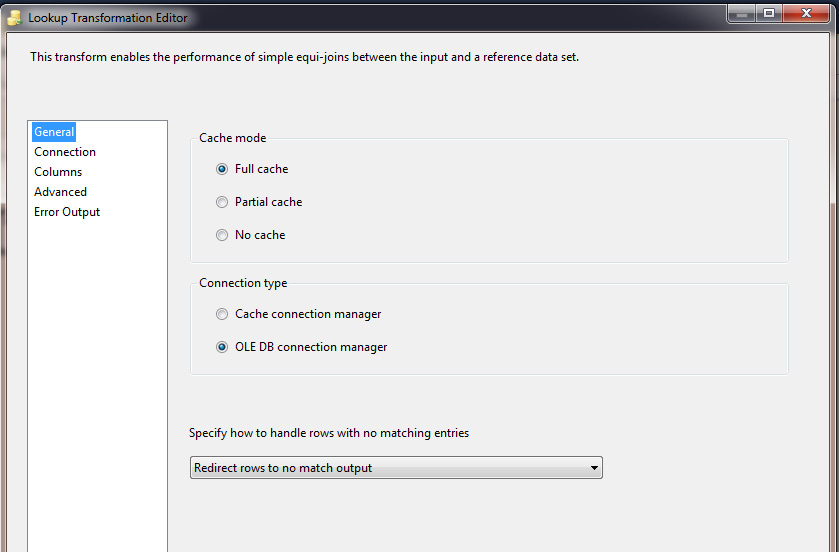
Connection should be OLEDB connection where you will select state datatable.
Now go to columns menu (You can get it on left side) and here you will find both table columns left side your source columns and right side state datatable.
Drag and drop an arrow from src_statename to statename as shown in below image and make a check in checkbox for state_id representation is shown below.
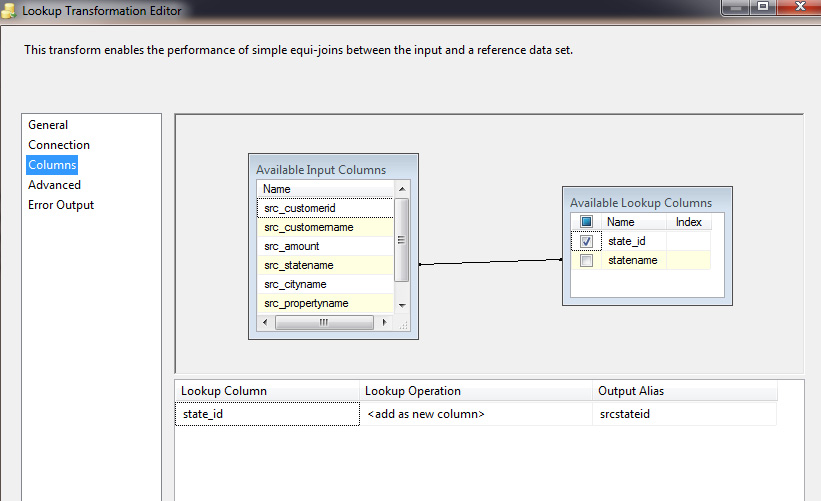
Once done click on OK button to save it. So by now we have state_id and this we can insert in our destination fact-table as a foreign key.
Step 7 :
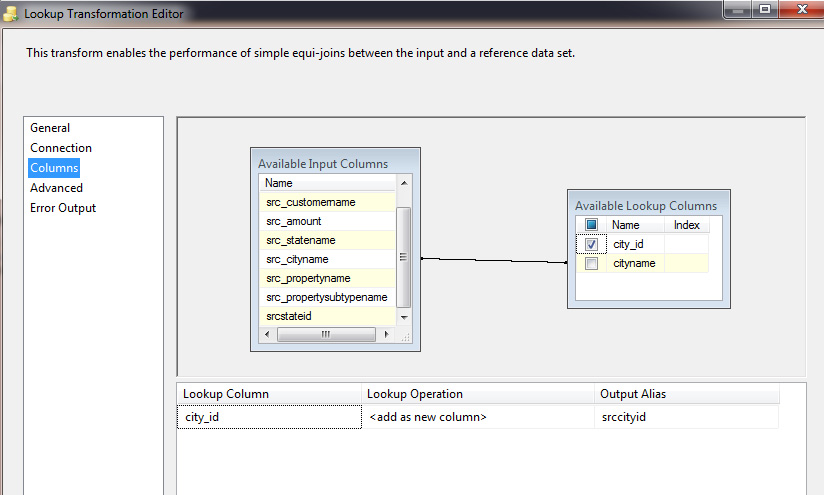
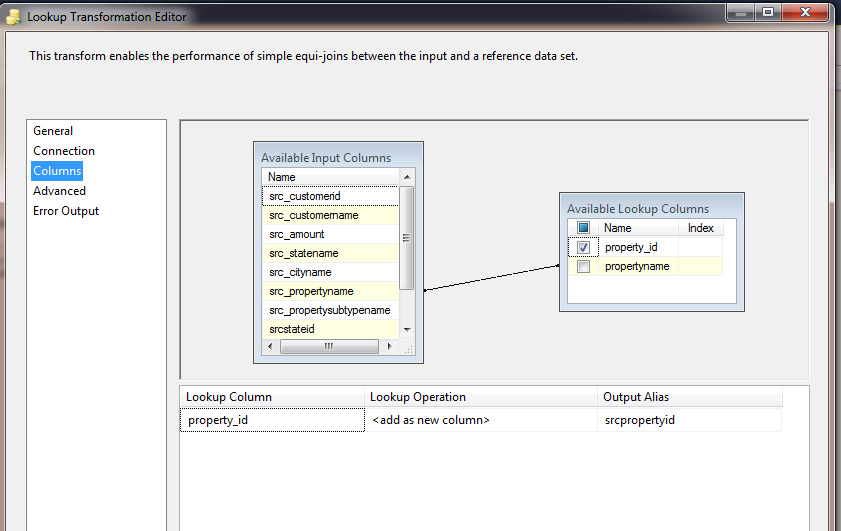
As we did for state table, now you can repeat the same steps for city, property and propertysubtype.
For every master table just make a new Lookup component and configure it as shown in below images.
Step 8 :
So hey guys we have now all foreign keys so let's load this data in a destination fact-table.To do that we will use ADO.NET destination component.
So right on ADO.NET destination component and configure component as match the columns as shown in below image.
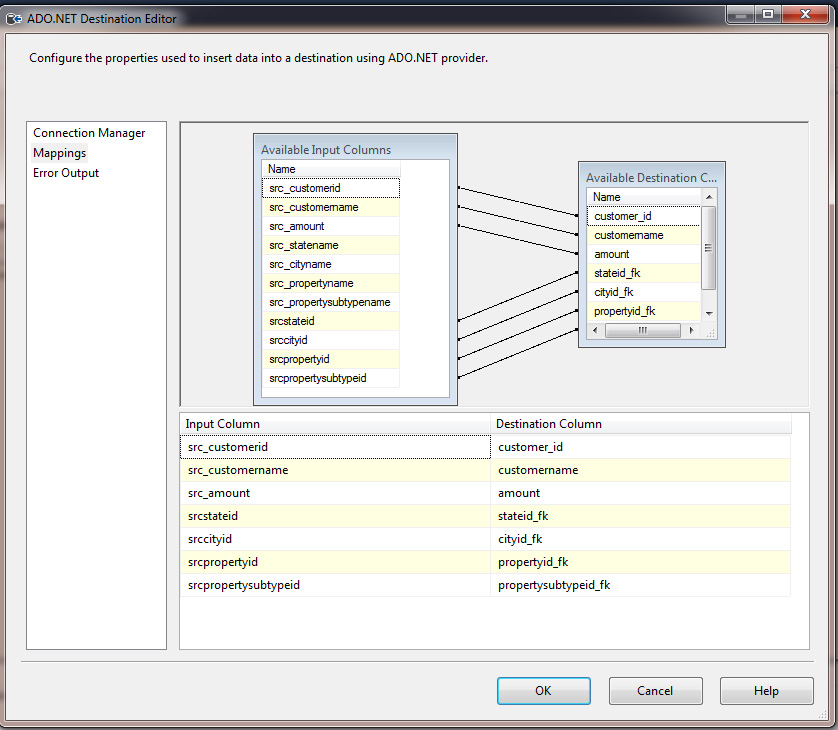
Once done save it
Step 9 :
Since we have configured all master table and fact table now its time load run those following packages.
We will first load master tables then fact table .
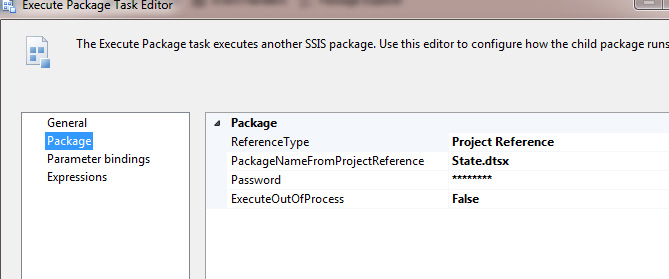
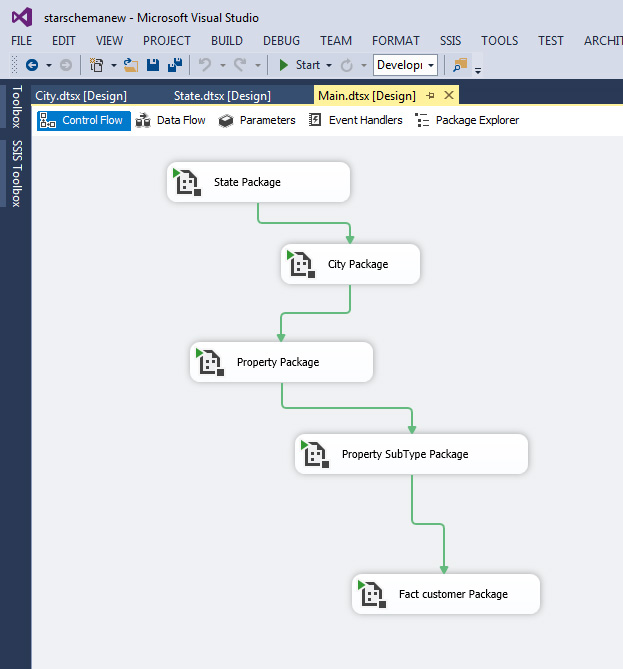
In order to this we will go to our Main package which we have created earlier and in the control tab from SSIS toolbox drag and drop Executive package task component and configure state package to it.
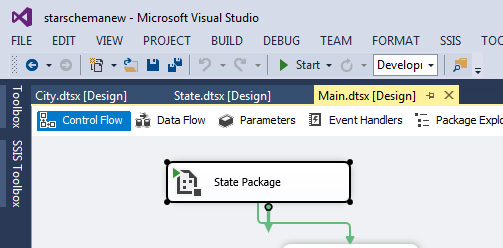
Right click -> Edit on package to configure it -> In the package select state.dtsx package as shown in below image.
Same way repeat this step for other packages as shown in below image.
Step 10 :
Great guys we are on to our final step, go to property window right click on Main.dtsx package and make it as start up package. Since we have multiple packages and we need to tell visual studio which package to load first here Main.dtsx package we want to load first so we will make this as start up package.
When we call this Main.dtsx package using Executive package task component it will automatically call other packages one by one starting with master packages followed by fact-table package.
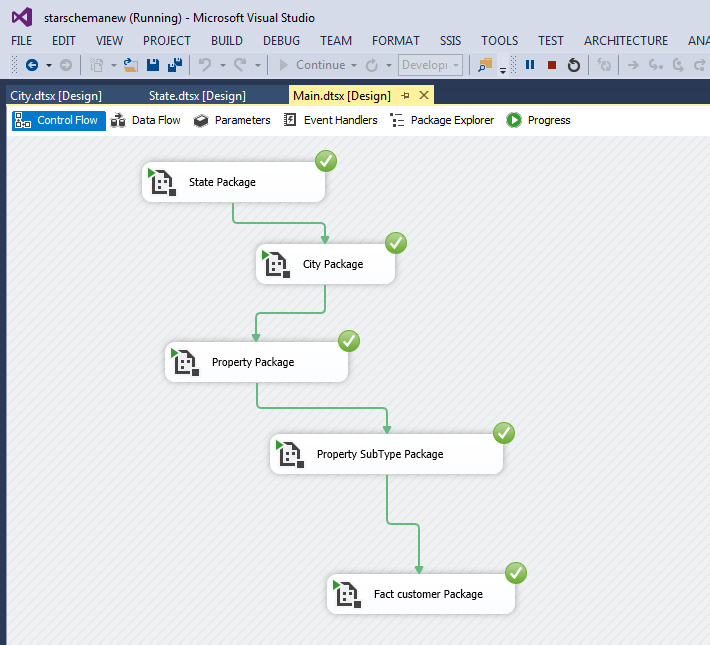
Run this package click on F5 to run it and get output as shown in below images.
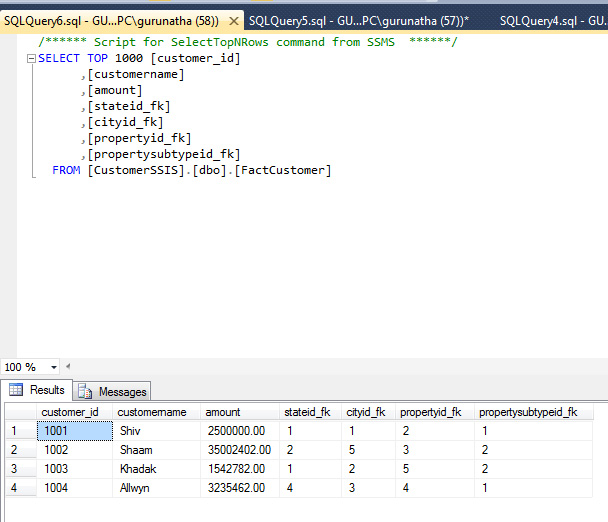
OUTPUT :
Friends, hope you have enjoyed this session in the next session we will see designing of snowflake schema. If you enjoyed this session and find useful please share it with your friends on Facebook, Google+, Twitter and so on.Thank you.
Order only MSBI self-study learning video materials which are available with customized package costing 999 INR/15$. Click this link here to see details and order it.