
Hello Friends, welcome to learn #MSBI step by step I'm your #MSBI host Gurunatha S.Dogi.
Little About Me : I'm one of the trainer in Questpond having more than 8 yrs of experience in #server tools, #programming and #seo. I do take trainings for freshers or an individual with 3 yrs of experience. My focus area to teach / concentrate freshers to make them comfortable in learning technology step by step. In short to make their basics strong to get started into tech world. If you want to learn #MSBI step by step then feel free to touch base with the below mentioned details.
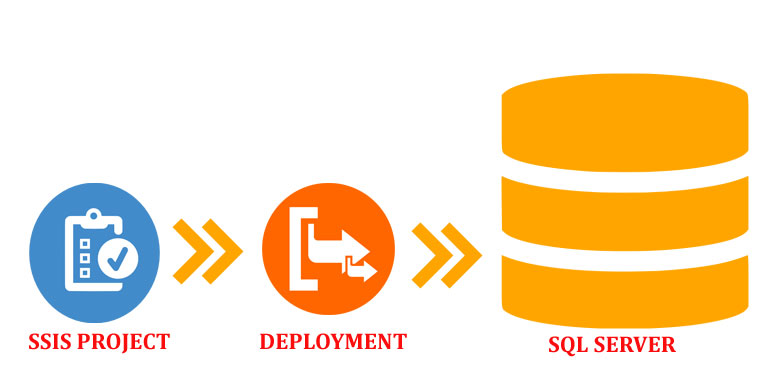
Today, In this session we will learn how to do SSIS project deployment or SSIS package deployment step wise or to deploy SSIS project into production server.
Deployment : Deploying is nothing but moving something from one place to another place. For example let's say deploying doctors at rural areas for medical support. So same way ssis project deployment is nothing but uploading / moving project to production server or main server.
So here we will learn how to do ready project deployment to a production server.
Let me just explain you about an example : Here we will create a simple project of moving simple text file from local server to production server for this example we will use SSIS great component called "File System Task", before that we will test the example at the local end then final copy we will move it to production server for actual execution.
Now you guys must be thinking that what we will move and where we will move. So for that let's began our step by step
Step 1
Create a new fresh SSIS project and on control tab from SSIS toolbox drag and drop SSIS File System Task component using this component we will move a simple text file from source to destination - This we will test it in local system so we will create locally two folders i.e. source folder and destination folder respectively and same way we will create a simple text file which says "HELLO MSBI".
Step 2
In this step two folders named "Source" and "Destination" as shown in below image.
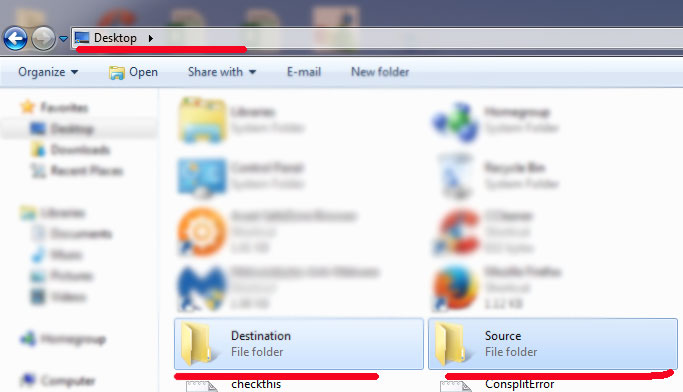
Now create a simple text file and add this line "HELLO MSBI" and save it to "Source" Folder with a nice name i.e "mydeploy.txt".
Step 3
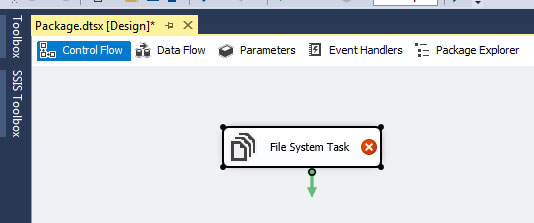
Once you are completed above step successfully move it third step i.e. create a SSIS project and from SSIS toolbox drag and drop SSIS File System Task component.
Step 4
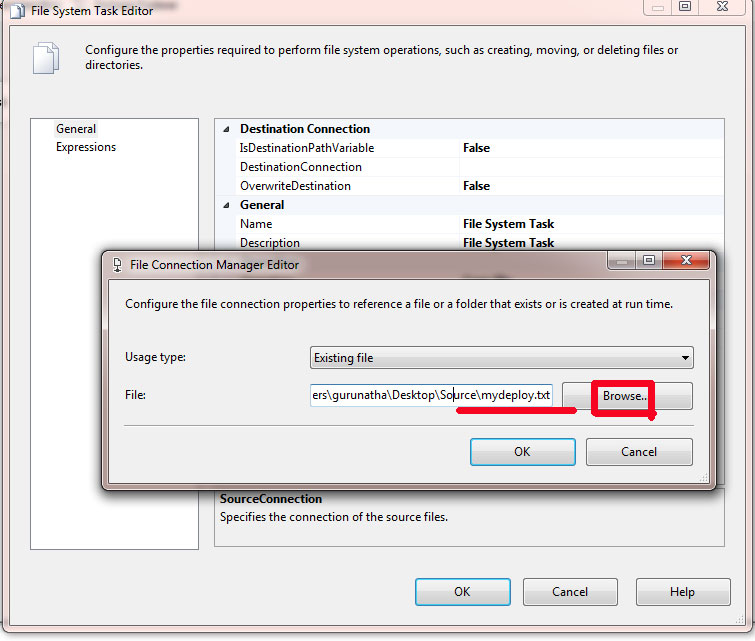
Configure File System Task component : So right click -> Edit, go to source connection and click on new connection as shown in below image.
Choose existing from usage type because we have already created text file and we want to use that same file. So click on browse and choose our text file "mydeploy.txt" as shown below image.
Step 5
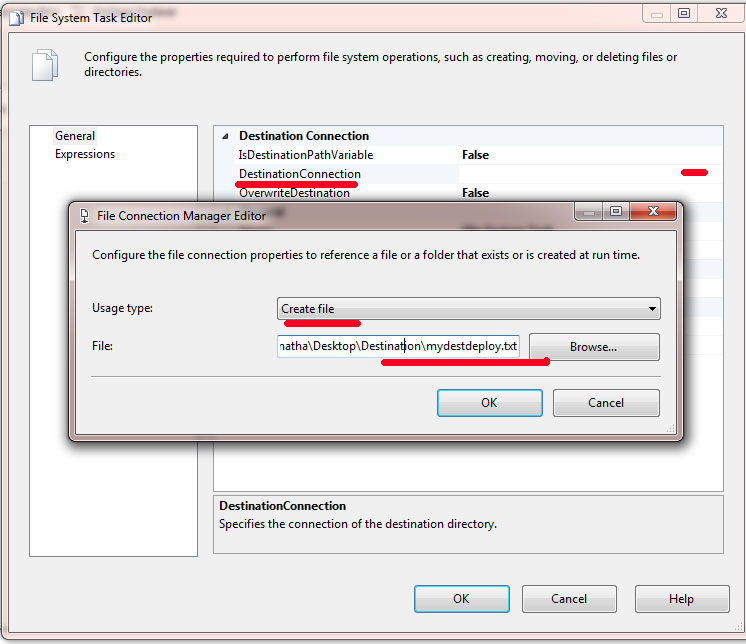
After configuring source connection now do the same steps for destination connection right click File System Task component -> Edit -> usage type choose create file why because we want to move data from source to destination so create new text file "mydestdeploy.txt" and save it as shown in below image.
Step 6
Now run this solution just to ensure everything is proper : testing at local end before moving it to production server.

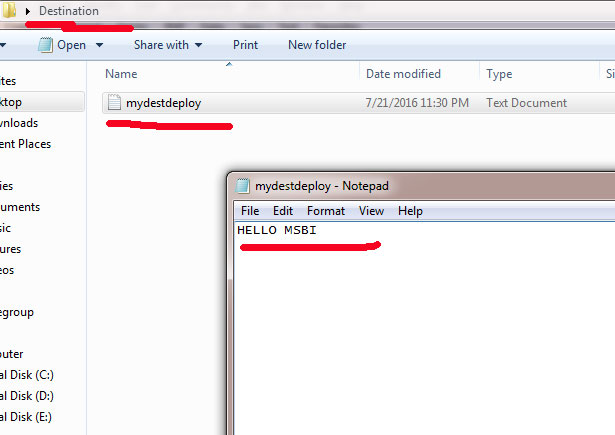
As you see we have successfully created and executed a simple File System Task project. Our main motto is to see demonstration of SSIS project deployment thatswhy we did a small and simple example. Now we will try to deploy this project to production server step by step.
Step 7
In order to understand deployment completely first we need to see what will get deployed to production server.
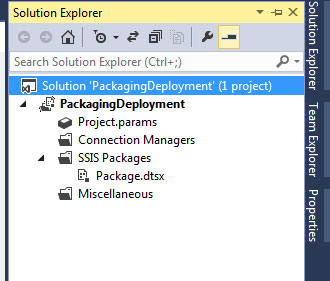
It shows how solution of a SSIS project is structured if you see above image there is a solution -> project -> parameters & package -> Package.dtsx as shown in below image.
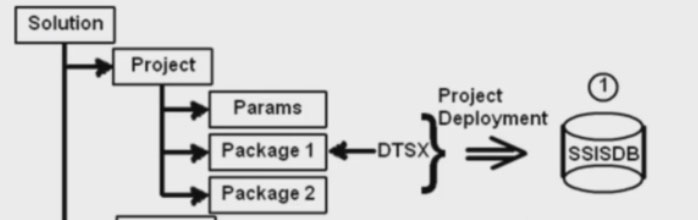
So when we do package depolyment all this files gets uploaded to production server (SQL SERVER SSISDB).
Step 8
This is optional step but still if any one doesn't have SSISDB in their SQL Server for them it is useful. Open your SQL Management Studio and Find Integration Services Catalogs -> right click and create catalog -> Check Enable CLR Integration to ensure smooth running of catalog -> Type your password and save it.
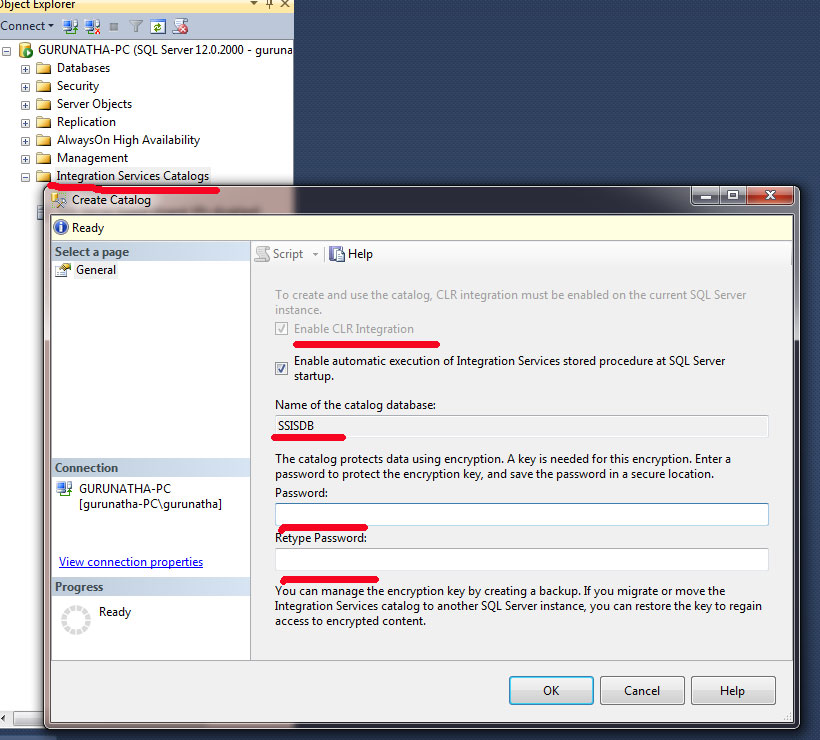
This will create your SSISDB catalog under Integration Services Catalogs.
Step 9
Once your SSISDB catalog is ready just right click on that and create folder why because to save our deployment files we need a folder under SSISDB catlog.
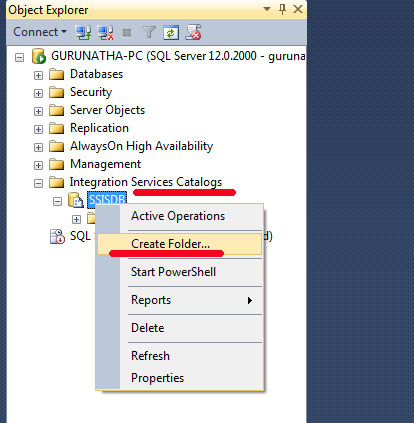
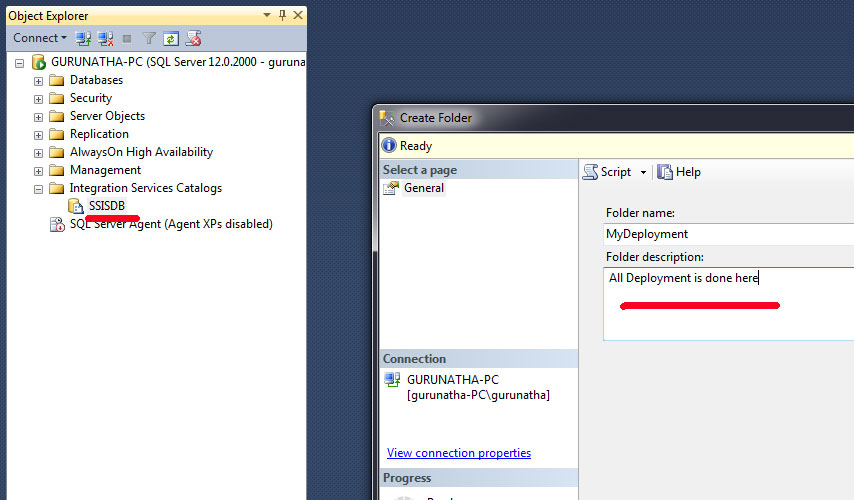
As you see we have successfully created a folder under SSISDB. Now this will our place to store deployment project.
Step 10
Now go to SSIS project and go to solution explorer do the steps as shown in below image.
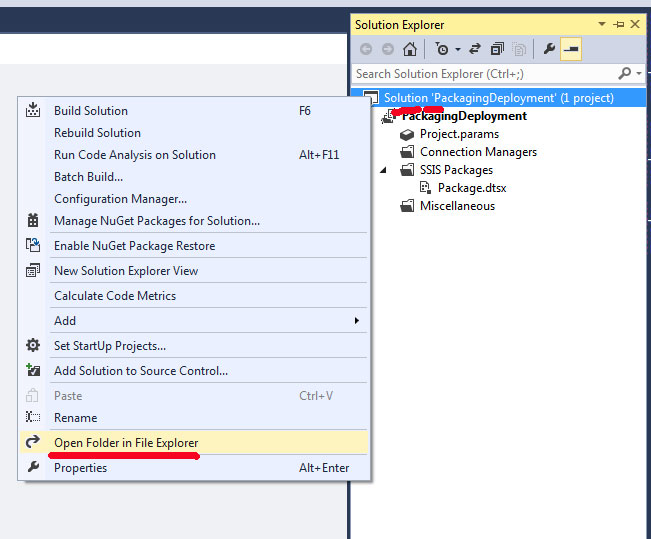
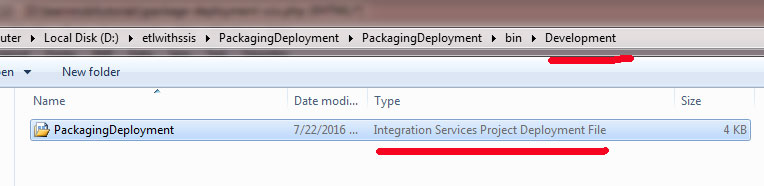
After clicking you will be navigated to filde containing folder inside there will a Microsoft Visual Studio Solution and a Folder as shown in below image.

Now inside that folder -> Bin Folder -> Development Folder -> PackagingDeployment (Integration Services Project Development File). If you see its property it is also called as .ispac extension file.
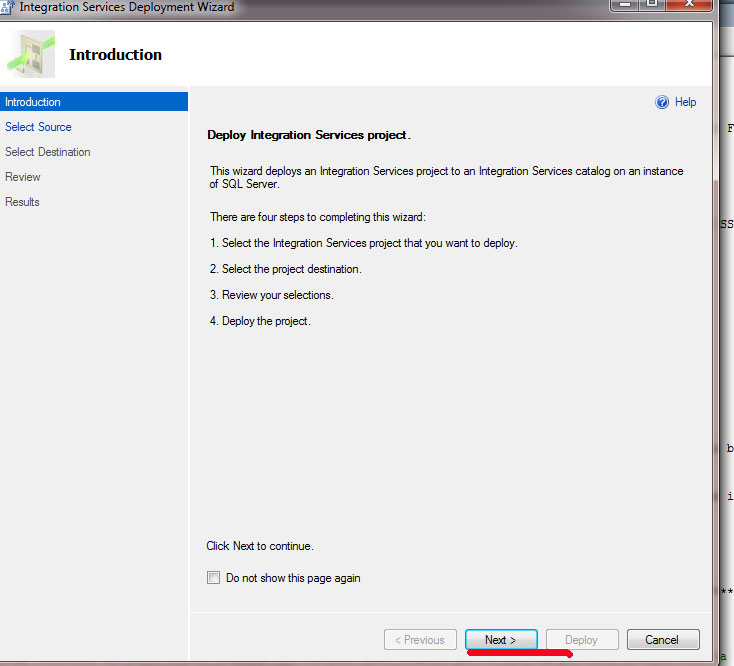
Just double click on it an Integration Service Wizard will open up wizard.click on next

Since we are doing project deployment we need to choose that and click on next.
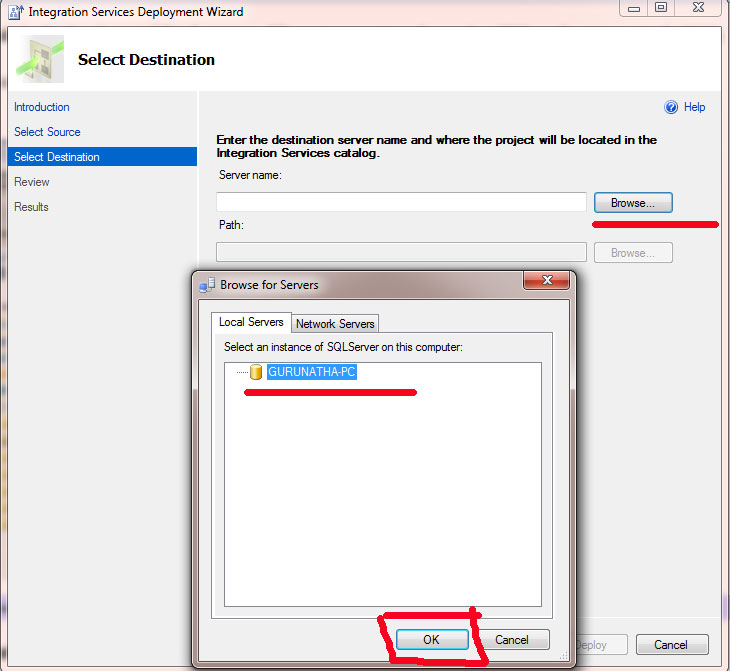
Here we need to select our Server Name because we are deploying this project to SQL Server. So choose server
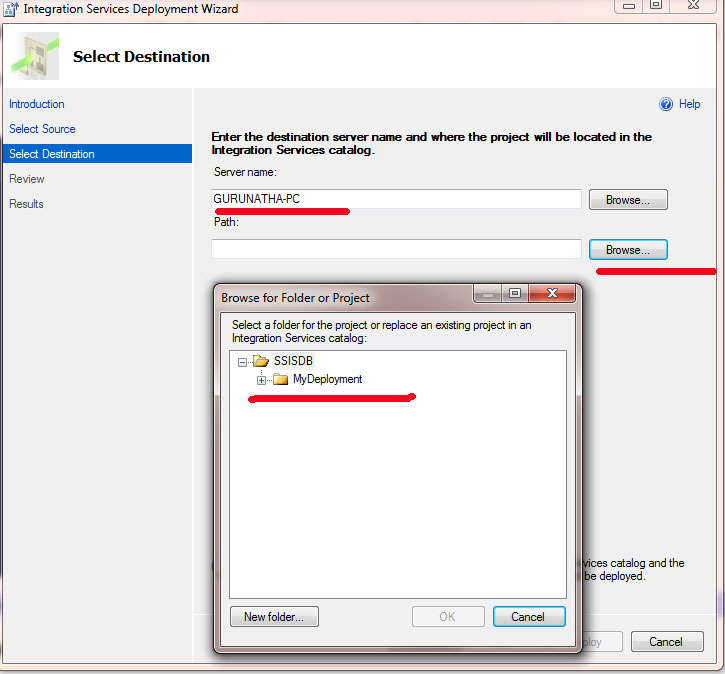
Once your server is selected next thing we need to select path the path is nothing but the folder which we have created under SSISDB catalog.

Select the SSISDB catalog folder path and click on next step to review deployment.
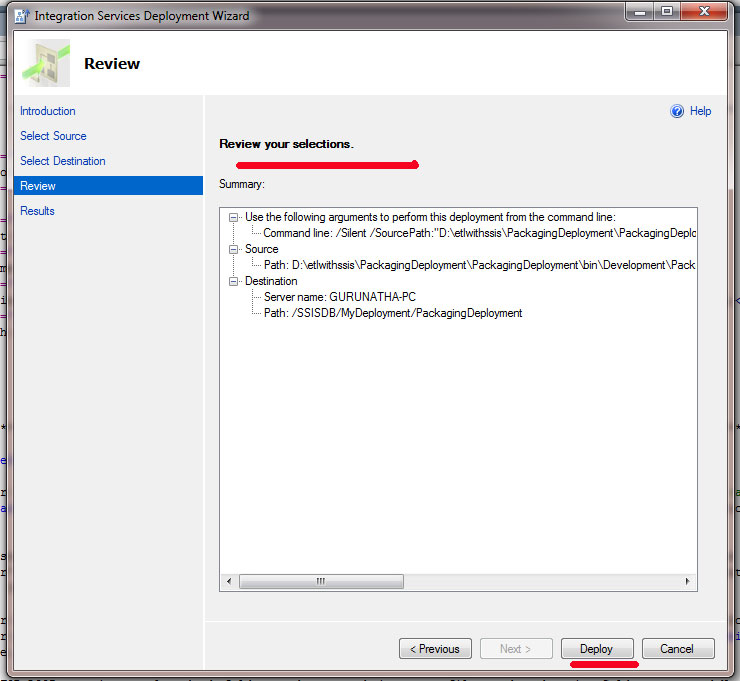
Finally click on Deploy button to deploy the package.
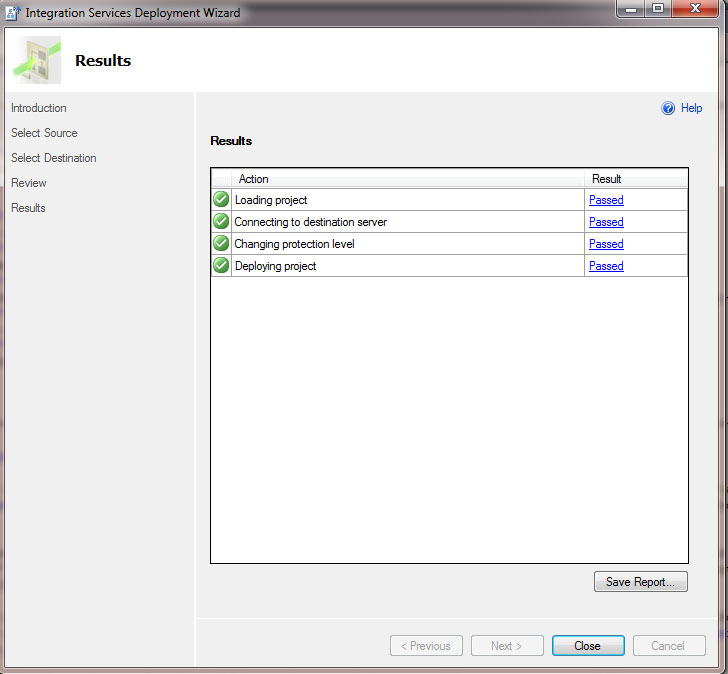
As you see our project is deployed successfully.
Step 11
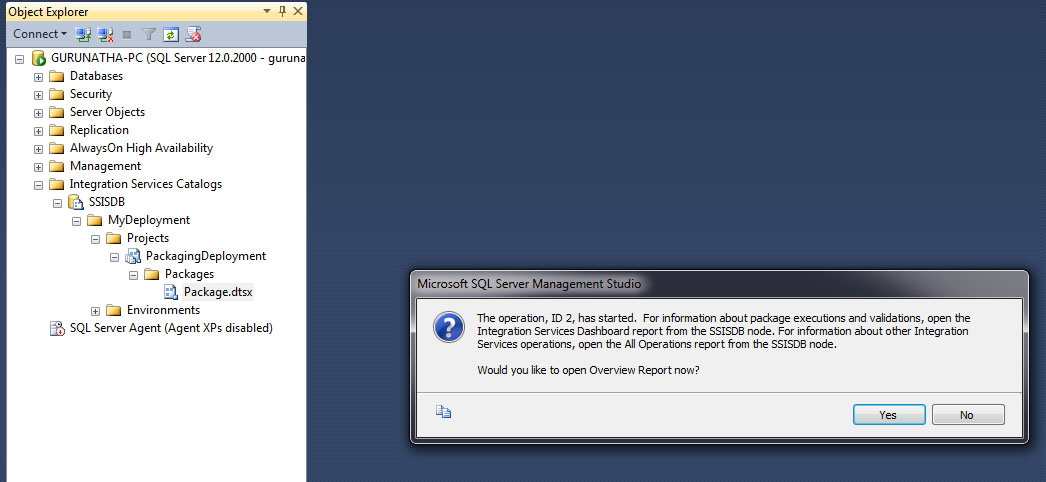
Go to SQL Server Management Studio -> SSISDB Catalog -> MyDeployment. To check deployment is processed successfully or not.
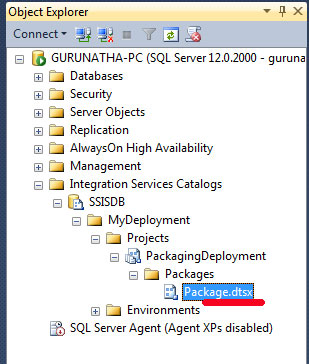
As you see we have deployed our project successfully.
Step 12
Now just right click on .dtsx and Execute the project .
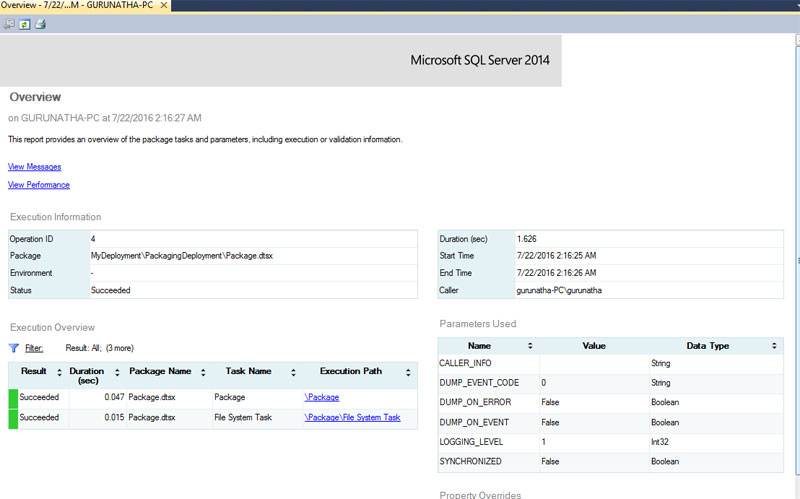
Celebration Time : We have successfully executed the project. So hey guys hope you understood and liked the article if you have any doubts or if i have missed anything feel free to ping me on below mentioned details.
Order only MSBI self-study learning video materials which are available with customized package costing 999 INR/15$. Click this link here to see details and order it.