
Hey friends, welcome to learn msbi step by step. In today's session we will understand error handling in SSIS.
In our previous Lab we have seen how to implement data conversion component in SSIS. If you want to know more about this article then click here.
Friends, If you are new to this website or want to start your MSBI then you are right place, We provide complete training on MSBI our faculties are MVP holders.Apart from training and support we do have self learning material in form of DVD and access to our learning video website.
Kindly feel-free to talk to us to start #MSBI
Now coming to back to article.
During ETL process we transfer millions of records from source to destination during this transfering there might be one or two multiple data row errors. These errors can cut off tranfering of records and if we want to load proper data to destination without any error records then it is important to catch that records that can cause an error.
Friends, if you have read our previous articles or watched our videos there we have explained you only about output. We have not shown anything related to error which occurs during runtime. If any error occurs in the data flow how to handle that or how to log an error we have not explained you. So in this article we thought you to explain to log an error if it occurs during runtime.
This log error will help us to fix an issue as ASAP or it will help us to know what problem exactly occured.
When working with SSIS data flow, you will get many SSIS component divided in three sectors i.e. sources, transformation and destination. These many data flow components used during ETL process supports error outputs to handle errors. In the SSIS component we can specify how we want component to behave for example if we want an error output during error occured or during truncation occured. SSIS allows a developer to create an error output through which error rows are directed from secondary pipe.
This secondary pipe can be connected as a input to another transformation component or destination component.For example we can connect error output from derived column to ADO.NET destination or from derived column to Flat file destination we can choose any combination that suits our requirement.
Error outputs contains bad rows along with ErrorColumns, ErrorCode and ErrorDescription.
Now let's see some real-time example on Error-Handling or Error-outputs in SSIS.
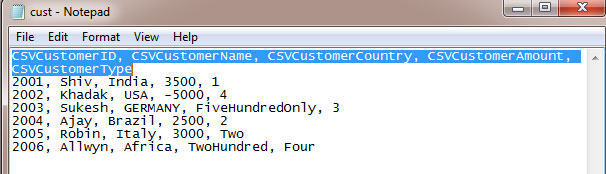
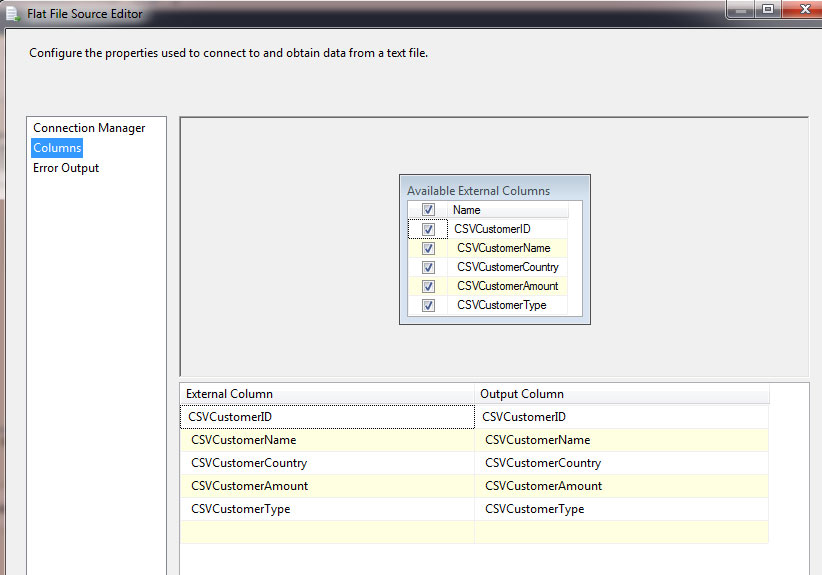
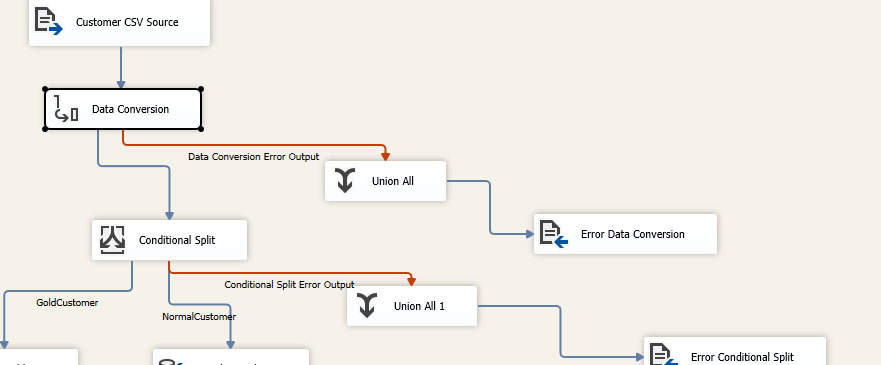
In this example we will take up a simple customer CSV source file with columns like CSVCustomerID, CSVCustomerName, CSVCustomerCountry, CSVCustomerAmount, CSVCustomerType..as shown in below image then we will try to load this data in SQL Server Database. In between for proper loading of data we will first do the data conversion then we will split the data according to CSVCustomerType i.e if CustomerType is 1 or 2 we will consider as GoldCustomer and if CustomerType is 3 or 4 we will consider as NormalCustomer and for same we will create two different tables then accordinly we will do the loading into Database.
This is our breif summary about this example. So let's do this example stepwise.
Step 1
Let's create a SSIS -> New -> Project
Once you have created SSIS project just drag and drop Data Flow Task component in the Control Flow Tab. Now just rename Data Flow Task with a nice name.
Step 2
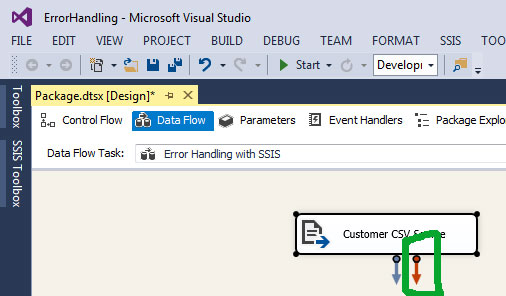
Just double click on that Data Flow Task it will take you to Data Flow Tab. Here from SSIS toolbox drag and drop Flat File Source and configure comma CSV file.
Step 3
As we told earlier that we will create two different tables for GoldCustomer and NormalCustomer. So lets create that tables with proper data-type
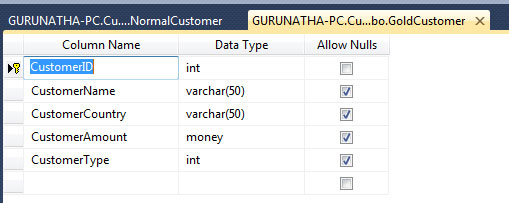
Same column name we have added for GoldCustomer Table.
Step 4
If you see in our above SQL Data tables our CustomerID and CustomerType is of INT data-type and CustomerAmount is of MONEY data-type so accordinly we need to set data-types which is incoming from source.
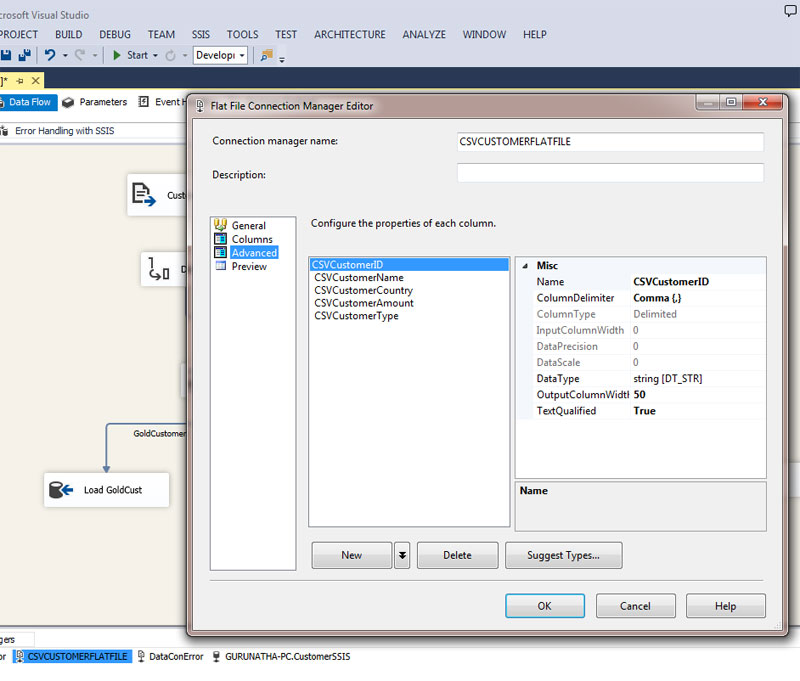
As we you that data which is incoming from source i.e. from CSV file SSIS or SSDT by default set data-type as DT_STR i.e string datatype. If you want to see datatype just click on Flat File connection manager -> Advance -> On right hand side -> Third-last row -> DataType as shown in below image.
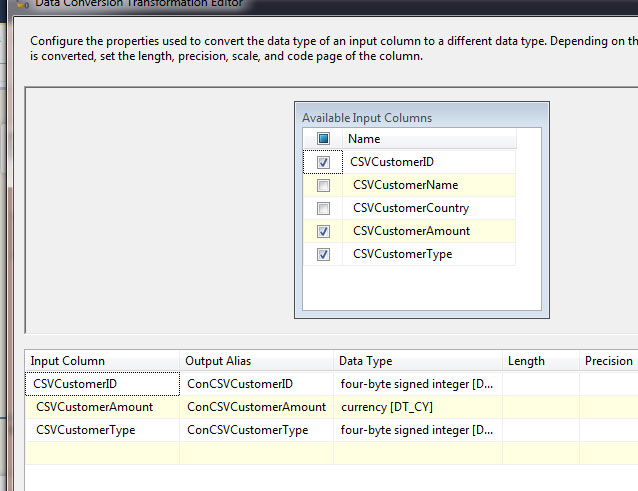
To to update this data-type we need to add one more component i.e. Data Conversion component from SSIS toolbox. So just darg and drop component and attach blue arrow of CSVFlatFileSource to it.
Now right click edit Data Conversion component and just select three columns and give assign proper data-types i.e four-byte signed integer and DT_CY (currency).
Now we also need to configure error output why because if you see our CSV File in customer amount column there is a string representation of money "FiveHundredOnly" and "TwoHundred" that is data-error so we should remove that error-row before it stops running the process.
Let's configure error output. To configure error output just right click Data Conversion component edit -> below see there is a button called "Configure Error Output" so click on that button a new modal form will open in that choose columns and in error column choose "Redirect row" why because we want to redirect error-row to some other destination for correction of data.
Finally apply it and come out by clicking OK button.
So we have two output one is proper data and another one is error-data.
Step 5
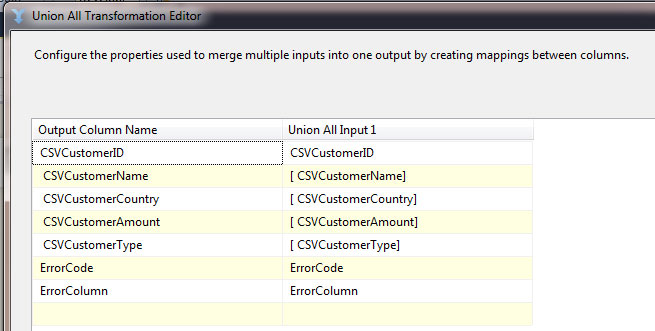
Union All : Union-All component combines multiple inputs into one output. For example if we want combine multiple Flat File Source to a single output.
Here to output error with an ErrorCode and ErrorDescription we will use Union-All component.
Just drag and drop Union-All component and then just pull the red arrow from Data Conversion component and attach it to Union-All component and configure it.
Step 6
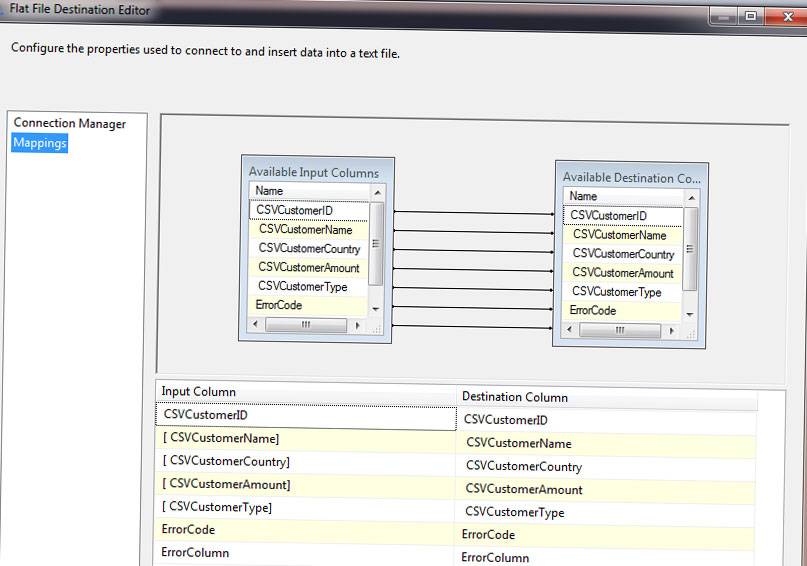
For an error output we will add a new destination component i.e. Flat File Destination you can use any destination component.
Just drag and drop Flat File Destination and attach union-all component to it and right click -> edit and -> configure the Flat File Destination component.
Step 7
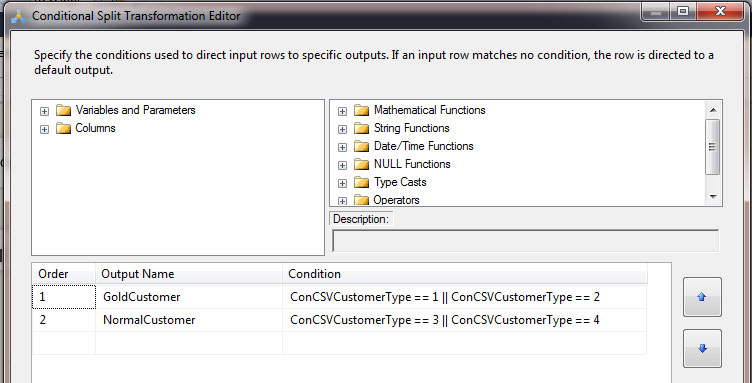
For this example further we need to divide the proper-data into two parts i.e. using CustomerType dividing customers into Goldcustomer and NormalCustomer.
To split data we will use nice component from SSIS toolbox i.e. Conditional Split. so just drag and drop this component and add the two conditions i.e. "ConCSVCustomerType == 1 || ConCSVCustomerType == 2" and "ConCSVCustomerType == 3 || ConCSVCustomerType == 4".
Step 8
Here we will add error-output component from conditional split just to ensure that data is splitting properly if an error occurs then it will redirect to error output flat file.
So as we did previously let's do the same thing i.e. configure-error output from conditional split -> Add Union-All component -> Flat File Destination.
Step 9
Final step just add two ADO.NET destination component and configure the last step from conditional component. Configure GoldCustomer Table and NormalCustomer to both destionation.
If all done properly just run the project to see output.
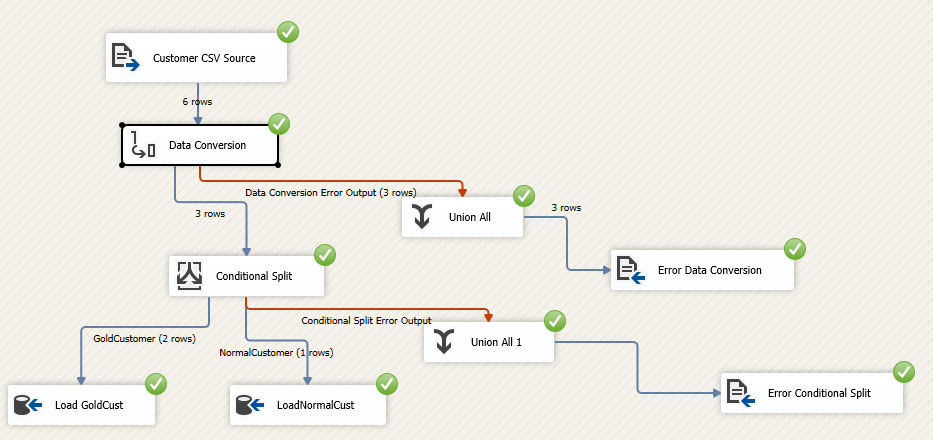
If you see this image you will see the rows which are redirected to error file is "Three" and we are expecting that and same way Conditional Split data properly i.e "Two" rows to GoldCustomer and "One" row to NormalCustomer.
So project is executed as expected.
Thank you friends, for reading this article if you liked this article kindly share it with your friends and do not forget thumb-up in FB, Twitter and G+
If you have any doubts or query regarding error output configuration feel free to touch base with us on the below mentioned contact details.
Order only MSBI self-study learning video materials which are available with customized package costing 999 INR/15$. Click this link here to see details and order it.